Author: alene

manual alarm station

Manual alarm stations are crucial, designated systems for manually triggering fire alarms, often called manual call points (MCPs). These devices are strategically placed for quick access.

They empower individuals to immediately signal a fire emergency, enhancing overall building safety and facilitating swift evacuation procedures when needed.

What is a Manual Alarm Station?

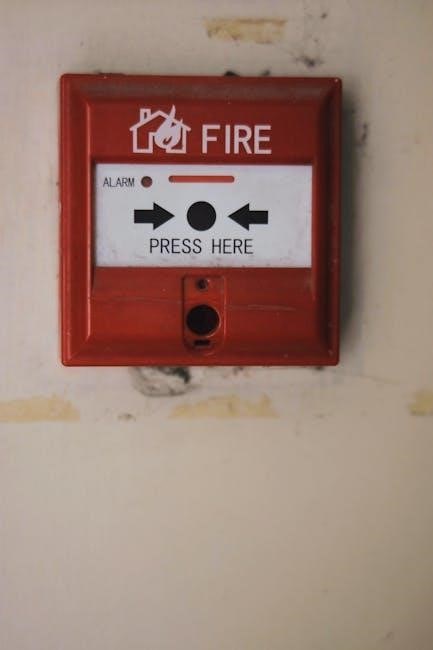
A manual alarm station, also known as a manual call point (MCP) or fire alarm call point, is a device enabling individuals to manually initiate a fire alarm; Unlike automatic detection systems, it requires human activation upon discovering a fire.

These stations are strategically positioned throughout a building, ensuring accessibility during emergencies. Typically, they feature a break glass mechanism or require a key to operate, immediately signaling an alarm to the fire alarm control panel.

Their primary function is to provide a reliable, direct method for occupants to alert others to a fire, supplementing automatic systems and enhancing overall fire safety protocols. They are a vital component of a comprehensive fire protection strategy.

The Role of Manual Call Points (MCPs) in Fire Safety

Manual Call Points (MCPs) play a critical role in a comprehensive fire safety system, acting as a vital component alongside automatic detection. They empower building occupants to proactively initiate an alarm upon discovering a fire, providing an immediate alert even before smoke or flames are widespread.

Strategically located MCPs ensure rapid activation, facilitating swift evacuation and minimizing potential harm. They are particularly important in areas where automatic detection might be less effective or delayed, offering a direct and reliable means of signaling an emergency.

MCPs complement automatic systems, creating a robust fire safety network, and are essential for protecting lives and property. Their accessibility and ease of use are paramount for effective emergency response.

Types of Manual Alarm Stations

Manual alarm stations come in diverse forms, including break glass call points, key-operated versions, and systems integrated with waterflow switches for activation.

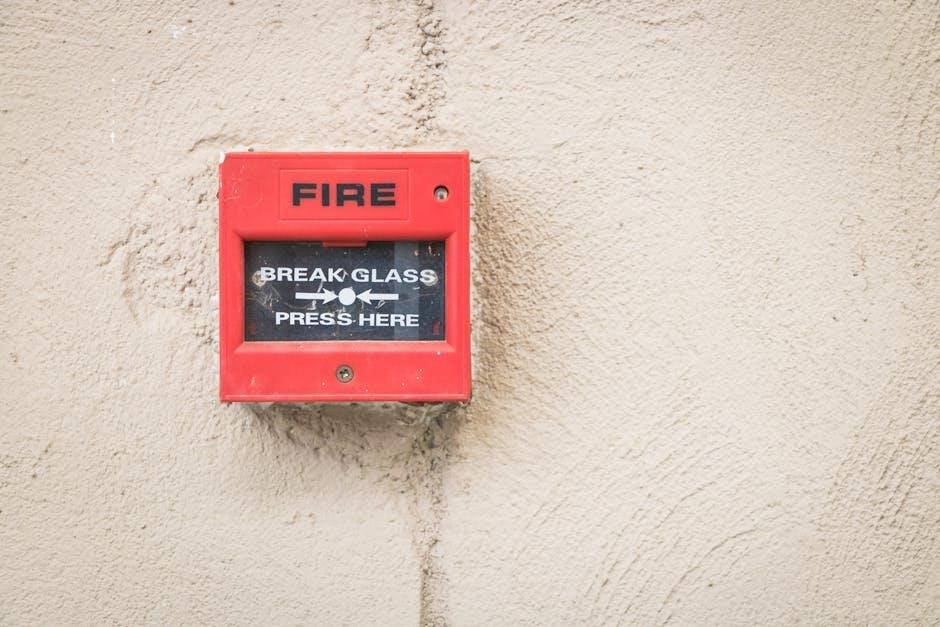
Break Glass Call Points

Break glass call points are a widely recognized type of manual alarm station, employing a frangible element – typically glass – protected by a cover. To activate the alarm, one must break the glass, exposing a button or lever.

These are designed for immediate, unambiguous activation in emergency situations. However, standards like EN 54-11 (Annex A) specify that simply moving the protective cover doesn’t constitute activation; the glass must be broken to trigger the alarm.

The HM-MCP-GLASS-AP is an example of an addressable break glass call point designed for integration with Morley IASs fire alarm control panels, prioritizing installation efficiency and compliance with current standards.

They are a common and reliable method for manual fire alarm initiation.

Key Operated Call Points

Key operated call points represent a more secure type of manual alarm station, requiring a specific key to activate the alarm. This feature is particularly valuable in environments where accidental or malicious activations are a concern, such as sensitive facilities or areas prone to vandalism.

Unlike break glass units, these don’t rely on physical destruction for activation. Instead, inserting the designated key and operating the mechanism initiates the alarm signal.

This controlled activation method minimizes false alarms while still providing a readily accessible means for authorized personnel to signal a fire emergency. They offer an added layer of security and prevent unintentional triggering.

Key operation ensures deliberate and authorized alarm activation.

Waterflow Switches as Manual Activation

Waterflow switches function as a unique form of manual alarm activation, primarily integrated within sprinkler systems. When the sprinkler system activates due to heat from a fire, the subsequent water flow triggers the switch, automatically initiating the building’s fire alarm system.

While not a direct manual pull station, this system provides an automated response to fire, effectively acting as a manual activation consequence. It’s a passive system, relying on the sprinkler’s activation to signal an alarm.

This integration offers a rapid and reliable method for alerting occupants and emergency services, complementing traditional manual call points. It’s a crucial component of comprehensive fire protection strategies, ensuring swift notification upon water discharge.

Waterflow switches provide automated alarm signaling linked to sprinkler activation.

Standards and Regulations

Fire alarm systems, including manual call points, are governed by strict standards like BS 5839-1, EN 54-11, and DIN VDE 0833-2, ensuring reliability and safety.

BS 5839-1: British Standards for Fire Detection

BS 5839-1 is the cornerstone of fire detection and alarm systems in the UK, providing comprehensive guidance on design, installation, commissioning, and maintenance. Regarding manual call points, this standard dictates that no person should be required to travel more than 25 meters to reach one on any storey.

This accessibility requirement is paramount for ensuring swift alarm activation in emergency situations. The standard also specifies considerations for the placement of MCPs, emphasizing visibility and ease of access for all potential users. Compliance with BS 5839-1 is not just a legal obligation but a fundamental aspect of fire safety management, guaranteeing a robust and reliable system.

Regular inspections and testing, as outlined within the standard, are vital for maintaining the operational effectiveness of manual alarm stations and the overall fire alarm system.

EN 54-11: European Standards for Manual Call Points

EN 54-11 defines the requirements for manual call points across Europe, ensuring a consistent level of reliability and performance. This standard meticulously details the construction, testing, and functionality of these critical fire safety devices. A key aspect covered by EN 54-11 concerns the activation mechanism; simply moving a protective cover isn’t sufficient to trigger the alarm.

The standard mandates that the frangible element – typically glass – must be broken to reliably activate the system. This prevents accidental activations and ensures a deliberate action initiates the alarm. Compliance with EN 54-11 demonstrates a commitment to quality and safety, providing confidence in the system’s ability to respond effectively during a fire emergency.

Rigorous testing protocols are integral to this standard.

DIN VDE 0833-2: German Standards for Installation

DIN VDE 0833-2 provides specific guidelines for the installation of manual call points within Germany, focusing on ensuring optimal functionality and accessibility. This standard dictates that these devices should be mounted at a clearly visible location, maintaining a consistent height of 1.4 meters, with a tolerance of plus or minus 0.2 meters, or plus or minus 0.4 meters;

Adhering to these height specifications is crucial for ease of use by all occupants, regardless of physical ability. The standard emphasizes the importance of referencing the complete DIN VDE 0833-2 document for comprehensive installation information. Proper installation, as defined by this standard, is paramount for the reliable operation of the fire alarm system and the safety of building occupants.

Detailed information is available within the standard.

Installation and Placement

Strategic placement of manual alarm stations is vital, ensuring accessibility from all building points, as dictated by standards like BS 5839-1. Visibility and ease of access are key.

Optimal Mounting Height (1.4m ± 0.6m)

Maintaining a consistent mounting height for manual call points (MCPs) is paramount for usability and compliance with safety regulations. The generally accepted standard, as referenced in DIN VDE 0833-2, specifies an optimal height of 1.4 meters (approximately 4.6 feet) with a tolerance of plus or minus 0.6 meters.

This range ensures that the MCP is readily accessible to the majority of building occupants, regardless of their stature. Deviations from this height can hinder quick activation during an emergency. Consistent height also aids in rapid identification of the call point location, particularly in stressful situations.

Adhering to this standard contributes significantly to a building’s overall fire safety strategy, promoting efficient and effective emergency response.

Strategic Locations for Accessibility

Strategic placement of manual call points (MCPs) is vital for ensuring swift fire alarm activation. According to British Standards (BS 5839-1), no occupant should have to travel an excessive distance to reach an MCP on any storey of a building.

Key locations include near all exits, on escape routes, and adjacent to stairwells. Accessibility must be prioritized; obstructions like furniture or displays should never block access. Consideration should be given to individuals with disabilities, ensuring MCPs are reachable from wheelchair height where feasible.

Properly positioned MCPs empower occupants to quickly initiate an alarm, maximizing safety and facilitating efficient evacuation procedures during a fire emergency.

Ensuring Visibility and Ease of Access

Visibility is paramount when it comes to manual call points (MCPs). They must be readily identifiable, even in low-light conditions or during periods of stress. Clear signage, utilizing universally recognized symbols, is essential to guide occupants.

MCPs should never be concealed behind obstructions or blended into the surrounding décor. A contrasting color scheme can enhance visibility. Furthermore, ease of access is crucial; the activation mechanism must be operable with minimal effort.

Regular inspections should verify that MCPs remain unobstructed and clearly visible, ensuring that anyone can quickly and effectively initiate a fire alarm when necessary, contributing to overall building safety.

Operational Requirements

Manual call point operation involves pressing the button to activate the alarm, immediately confirming the fire situation, and ensuring proper installation for reliable functionality.

Activating the Alarm: Pressing the Button

Activating a manual alarm station is a straightforward, yet critical, process designed for rapid response in fire emergencies. Typically, this involves firmly depressing the button or breaking the frangible element – as seen in break glass call points – to initiate the alarm signal.

Upon activation, the system immediately transmits a signal to the fire alarm control panel, triggering audible and visual alarms throughout the building. It’s essential to understand that simply moving a protective cover, without breaking the element, doesn’t activate the call point, adhering to EN 54-11 standards.

This direct manual intervention bypasses automatic detection systems, allowing anyone discovering a fire to promptly alert others, even if smoke or flames haven’t yet been detected by sensors. This immediate action can be life-saving.

Confirming the Fire Situation

Following alarm activation from a manual call point, confirming the actual fire situation is paramount, despite the urgency. While immediate evacuation is often necessary, briefly assessing the source of the alarm helps prevent unnecessary disruptions and ensures appropriate emergency response.

This doesn’t require extensive investigation, but a quick visual check for smoke or flames, or identifying the source of the activation, is advisable if safe to do so. Accurate information relayed to emergency services significantly improves their effectiveness.

Remember, false alarms can occur, and a confirmed fire allows for a focused and efficient response, minimizing potential damage and ensuring the safety of all occupants. Prioritize safety and follow established emergency protocols.

Proper Installation Procedures

Correct installation of manual call points (MCPs) is vital for reliable fire safety. Adherence to standards like DIN VDE 0833-2 is crucial, ensuring compliance and optimal performance. Mounting height should be precisely 1.4m ± 0.6m, guaranteeing accessibility for all occupants.

Wiring must be secure and conform to electrical codes, preventing malfunctions. The MCP should be firmly fixed to the wall, resisting accidental damage or displacement. Regular checks during installation verify proper functionality and responsiveness.

Qualified technicians should perform installations, documenting all work for future maintenance and inspection. Following these procedures guarantees the MCP will operate effectively when needed, protecting lives and property.

Maintenance and Testing

Regular inspection and testing of manual call points are essential for ensuring functionality. Scheduled checks, detailed record-keeping, and documented testing procedures guarantee reliability.

Regular Inspection Schedules

Establishing consistent inspection schedules is paramount for maintaining the reliability of manual alarm stations. BS 5839-1, the British Standard for fire detection, guides these intervals, typically recommending monthly visual inspections.

These inspections should verify the unobstructed visibility of the call point, ensuring the break glass or operating mechanism isn’t damaged or compromised. A more detailed functional test, involving activation of the alarm, should occur every six months.

Detailed records of all inspections and tests must be meticulously maintained, documenting dates, findings, and any corrective actions taken. This documentation provides a clear audit trail and demonstrates compliance with relevant safety standards, ultimately safeguarding building occupants.

Testing Procedures to Ensure Functionality

Functional testing of manual alarm stations is vital to confirm operational readiness. This involves simulating a fire scenario by activating the call point – breaking the glass or using a key, depending on the type.

Upon activation, verify the immediate transmission of an alarm signal to the fire alarm control panel and subsequent activation of audible and visual alarms throughout the building. EN 54-11 outlines specific testing requirements, including checking the responsiveness and reset functionality.

Document all test results, noting any delays or failures. Address any identified issues promptly, ensuring the system is fully functional before returning the call point to its normal state. Regular testing guarantees reliable performance during an actual emergency.

Record Keeping and Documentation

Comprehensive record-keeping is essential for maintaining a reliable fire safety system. Detailed logs should document all inspections, testing, and maintenance performed on manual alarm stations.

Each entry must include the date, time, technician’s name, specific call point tested or serviced, and a clear description of the actions taken and results obtained. Any faults or repairs should be meticulously recorded, along with the corrective measures implemented.

Maintain readily accessible documentation, including system schematics, manufacturer’s manuals, and testing reports. This ensures compliance with BS 5839-1 and facilitates efficient troubleshooting and future maintenance efforts, demonstrating due diligence.

nuwave infrared oven instruction manual

NuWave Infrared Oven Instruction Manual: A Comprehensive Guide

Welcome! This manual details various NuWave oven models – Pro-Smart, Bravo XL, Primo Grill, and Elite. It covers setup, operation, and maintenance for optimal cooking performance.

Understanding Your NuWave Oven

The NuWave Infrared Oven utilizes innovative infrared technology to cook food rapidly and efficiently. Unlike conventional ovens that heat air, NuWave directly heats the food itself, resulting in faster cooking times and enhanced moisture retention. This unique process ensures food is cooked thoroughly while maintaining its natural flavors and textures.

Several models exist, including the Pro-Smart, Bravo XL, Primo Grill, and Elite, each offering varying features and capacities. The core principle remains consistent across all models: utilizing infrared heat for superior cooking. Understanding this fundamental difference is key to maximizing your NuWave oven’s potential.

The oven’s design focuses on versatility, allowing you to cook a wide range of dishes – from frozen foods to fresh ingredients – with minimal preheating. It’s designed to mimic various cooking methods, such as baking, roasting, grilling, and even air frying, all within a single appliance. Familiarizing yourself with these capabilities will unlock a world of culinary possibilities. Remember to consult the specific model instructions for detailed operation.

Model Variations & Identification

NuWave offers a diverse range of infrared ovens to suit various cooking needs. Key models include the Pro-Smart Oven, Bravo XL Oven, Bravo Toaster Oven, Primo Grill Oven, Elite Oven, Pro Plus Oven, and Pro Plus 2 Oven. Identifying your specific model is crucial for accessing the correct instruction manual and support resources.

The Pro-Smart and Bravo XL are popular choices, known for their advanced features and larger capacities. The Primo Grill offers specialized grilling capabilities, while the Elite provides a more compact and affordable option. Newer models, like the Sous Vide Combi Steam Oven and Bravo XL Pro Smart Oven, incorporate cutting-edge technology.

Model numbers, such as 20356 (Pro Digital Controlled Infrared Tabletop Oven), 20101 (Infrared Oven Mini), and 20334 (Pro Infrared Oven), are typically located on a label affixed to the oven’s base or rear panel. Referencing this number when seeking assistance or replacement parts ensures compatibility. Distinguishing between models like 20322 Pro (Amazon) and 20326 (Bigkitchen) is important for sourcing correct information.

Unboxing and Initial Setup

Carefully unpack your NuWave Infrared Oven, ensuring all components are present. Typically, this includes the oven base, cooking dome, extender ring, roasting rack, and potentially other accessories depending on the model; Inspect for any visible damage incurred during shipping; report any issues immediately to the retailer.

Before first use, thoroughly clean the oven’s interior and all accessories with warm, soapy water. Rinse and dry completely. Place the oven on a stable, heat-resistant surface with adequate ventilation. Avoid positioning it near flammable materials or water sources.

Familiarize yourself with the power cord and ensure it’s securely connected to a grounded electrical outlet. Some models may require an initial ‘burn-off’ period to eliminate any manufacturing residue. This usually involves running the oven empty at a specific temperature for a designated time – consult your model-specific instructions for details. Proper initial setup ensures optimal performance and longevity.

Key Components and Their Functions

The oven base houses the heating elements and control panel, providing the core cooking power. The cooking dome, typically made of stainless steel, focuses infrared heat onto the food, ensuring even cooking and browning. An extender ring increases the oven’s capacity, accommodating larger dishes.

The roasting rack elevates food, allowing for 360-degree heat circulation and preventing it from simmering in its own juices. Some models feature a drip pan to collect fats and liquids, simplifying cleanup. The temperature probe (if included) monitors internal food temperature for precise cooking.

Infrared technology cooks food from the inside out, preserving moisture and nutrients. The heating elements generate intense, direct heat, reducing cooking times significantly. Understanding each component’s role is crucial for maximizing the NuWave oven’s capabilities and achieving consistently delicious results. Proper component usage ensures safe and efficient operation.

Control Panel Overview

The digital display clearly shows cooking time and temperature settings; Power buttons initiate and terminate the cooking process. Temperature control buttons allow precise adjustment of cooking heat, crucial for different recipes. Time control buttons set the desired cooking duration, often in minute increments.

Mode selection buttons access pre-programmed settings for various food types – roast, bake, broil, and more. A start/pause button begins or temporarily halts the cooking cycle. Some models include a high/low setting for adjusting cooking intensity. The clear/reset button reverts the panel to its initial state.

Understanding the control panel is vital for operating your NuWave oven effectively. Familiarize yourself with each button’s function before use. Refer to the pre-programmed settings guide for optimal results. Incorrect settings can affect cooking outcomes, so careful attention is recommended. The intuitive design ensures ease of use for all cooking levels.

Cooking Modes Explained

Roast mode utilizes consistent, moderate heat, ideal for larger cuts of meat, poultry, and vegetables, ensuring even cooking throughout. Bake mode provides gentle, all-around heat, perfect for cakes, cookies, and casseroles, mimicking traditional oven baking. Broil mode delivers intense, direct heat from above, quickly searing and browning food surfaces – excellent for finishing dishes.

Grill mode (available on Primo models) simulates outdoor grilling, imparting smoky flavors to meats and vegetables. Some NuWave ovens feature a combination mode, blending convection and infrared heat for faster, more efficient cooking. Air Fry mode (on newer models) circulates hot air for crispy, oil-free results, similar to deep frying.

Selecting the correct mode is crucial for optimal results; Experiment with different modes to discover what works best for your favorite recipes. Refer to the included recipe guide for suggested modes and cooking times. Understanding each mode’s characteristics unlocks the full potential of your NuWave oven.

Temperature and Time Settings

Temperature control on your NuWave oven is typically digital, allowing precise adjustments from 100°F to 400°F (or higher on some models). Use the “+” and “-” buttons to increase or decrease the temperature in increments of 5 or 10 degrees. Time settings are equally adjustable, ranging from 1 minute to several hours, depending on the cooking mode and recipe requirements.

Pre-programmed settings offer convenience, but manual control provides flexibility. When manually setting temperature and time, always consult a reliable recipe as a starting point. Monitor food closely, especially during initial use, to determine optimal settings for your preferences.

Remember that infrared cooking often requires shorter cooking times and lower temperatures compared to conventional ovens. Overcooking can lead to dryness, so err on the side of caution. The control panel displays both the set temperature and remaining cooking time, allowing for easy monitoring and adjustments throughout the cooking process.

Using Pre-Programmed Settings

Pre-programmed settings simplify cooking by automatically configuring temperature and time for common foods. Your NuWave oven likely includes presets for items like chicken, steak, pizza, potatoes, and frozen foods. To utilize these, simply select the desired food type from the control panel. The oven will then initiate the pre-set cooking cycle.

However, remember that these settings are general guidelines. Food weight, thickness, and initial temperature can affect cooking results. For optimal outcomes, it’s often beneficial to adjust the time slightly, especially when cooking larger or smaller portions.

The manual may provide specific recommendations for adjusting pre-programmed settings based on food characteristics. Don’t hesitate to experiment to find what works best for your preferences. While convenient, pre-programmed settings may not always deliver perfect results without some user customization. Always ensure food reaches a safe internal temperature.

Manual Cooking: A Step-by-Step Guide

Manual cooking offers complete control over the cooking process. First, place your food within the appropriate accessory – a roasting rack, baking pan, or directly on the cooking surface. Next, use the control panel to set your desired temperature. NuWave ovens allow precise temperature adjustments, crucial for achieving optimal results.

Following temperature selection, input the cooking time. Refer to recipes or general cooking guidelines for recommended times, adjusting based on food weight and thickness. Press the ‘Start’ button to initiate the cooking cycle. Monitor the food’s progress periodically, especially during initial attempts with new recipes.

You can pause the oven at any time to check food or make adjustments. Remember to use oven mitts when handling hot accessories. For best results, utilize a food thermometer to ensure food reaches a safe internal temperature. Manual cooking requires practice, but unlocks the full potential of your NuWave oven;

Accessories and Their Uses

NuWave ovens boast a versatile range of accessories, expanding cooking capabilities. The roasting rack is ideal for meats, promoting even cooking and crispy skin by allowing fat to drip away. Baking pans are essential for cakes, cookies, and casseroles, ensuring consistent heat distribution. The extension ring increases oven capacity, accommodating larger dishes or whole chickens.

A drip pan collects grease and juices, simplifying cleanup and preventing smoking. Specialized accessories like the sear plate deliver intense heat for searing steaks and browning foods. Some models include a grill rack for achieving grill marks and flavors. The steaming rack facilitates healthy steaming of vegetables and fish.

Understanding each accessory’s function unlocks the oven’s full potential; Always refer to recipe instructions for recommended accessories. Proper accessory usage ensures optimal cooking results and extends the lifespan of your NuWave oven. Explore the possibilities!

Cooking with Different Accessories

Utilizing accessories dramatically alters cooking outcomes. With the extension ring installed, roasting a whole chicken becomes feasible, ensuring even cooking throughout. Employ the roasting rack for succulent, crispy-skinned poultry and meats; the elevated position allows for all-around heat circulation. For baking, the baking pan delivers consistent results for cakes, breads, and casseroles.

The drip pan is crucial when cooking fatty foods, preventing smoke and simplifying cleanup. Achieve perfectly seared steaks using the sear plate, capitalizing on intense, direct heat. For healthier options, the steaming rack preserves nutrients and flavors in vegetables and fish. The grill rack imparts those desirable grill marks on burgers and vegetables.

Experimentation is key! Remember to adjust cooking times based on accessory usage. Always consult recipes for specific recommendations. Proper accessory selection maximizes the NuWave oven’s versatility and delivers exceptional culinary results.

Cleaning and Maintenance

Regular cleaning ensures optimal performance and longevity of your NuWave oven. Always unplug the unit and allow it to cool completely before cleaning. The cooking well and accessories are dishwasher safe, offering convenient cleaning. For stubborn residue, use a non-abrasive cleaner and a soft cloth; avoid harsh chemicals or scouring pads which can damage the surface.

The exterior can be wiped down with a damp cloth. Pay attention to the heating element, gently removing any food particles with a soft brush. Never immerse the oven base in water. Periodically inspect the power cord for damage and replace if necessary. Proper ventilation is crucial; ensure vents are clear of obstructions.

Preventative maintenance includes wiping up spills immediately and avoiding overheating; Following these simple steps will keep your NuWave oven functioning efficiently for years to come, delivering consistently delicious results.

Troubleshooting Common Issues

Oven not heating? Ensure it’s properly plugged in and the power outlet is functioning. Check the timer settings – it may not be activated. Food cooking unevenly? Rotate the food during cooking, or ensure it’s spread evenly across the cooking surface. Consider using the appropriate accessory for the food type.

Error messages? Refer to the full instruction manual for specific code definitions. Smoke during operation? This could indicate excessive grease or food particles; clean the oven thoroughly. If the unit still smokes, discontinue use and contact customer support.

Difficulty with pre-programmed settings? Double-check the food weight and type match the setting’s requirements. For persistent issues, consult the NuWave website or contact their support team for assistance. Remember to always prioritize safety and avoid attempting repairs yourself.

Safety Precautions

Always operate the NuWave Infrared Oven on a stable, heat-resistant surface, away from flammable materials. Never immerse the oven base, power cord, or plug in water or other liquids. Ensure the oven is unplugged before cleaning or performing maintenance. Avoid touching hot surfaces; use oven mitts or tongs when handling hot accessories or food.

Do not operate the oven if the power cord or plug is damaged. Keep the oven out of reach of children. Never use abrasive cleaners or scouring pads, as they can damage the non-stick surface. Ensure proper ventilation during operation to prevent overheating.

Exercise caution when using metal cookware, as it may become very hot; Always allow the oven to cool completely before storing. If the oven malfunctions, discontinue use and contact NuWave customer support for assistance. Prioritize safety to prevent burns or electrical hazards.

Recipes and Cooking Times (General)

The NuWave oven excels at quickly cooking various foods. For frozen chicken, a general guideline is 30-40 minutes at 375°F (190°C), flipping halfway through. Steaks (1-inch thick) typically require 15-20 minutes at 400°F (200°C) for medium-rare. Vegetables like broccoli and carrots roast beautifully in 10-15 minutes at 350°F (175°C).

Pizza, even frozen, can be ready in under 10 minutes using the pre-programmed setting or manual control. Baked potatoes take approximately 45-60 minutes at 400°F (200°C). Remember these are estimates; adjust cooking times based on food thickness and desired doneness. Experiment with the oven’s capabilities!

For best results, utilize the included cooking guide or explore online resources for specific recipes tailored to NuWave ovens. The infrared technology cooks food rapidly, so frequent checking is recommended. Enjoy exploring diverse culinary possibilities with your NuWave!

Where to Find Replacement Parts

Replacement parts for your NuWave Infrared Oven can be sourced from several locations. The official NuWave website is a primary resource, offering a comprehensive catalog of components, including cooking racks, extension rings, and drip pans. Amazon also carries a wide selection of NuWave parts, often with competitive pricing and fast shipping.

eBay is another viable option, particularly for discontinued or older models, where you might find used or new-old-stock parts. When purchasing from third-party sellers, carefully review the seller’s ratings and return policies. Bigkitchen is also mentioned as a potential source for certain models, like the 20326.

For specific part numbers or assistance identifying the correct component for your model, contacting NuWave’s customer support directly is recommended. Ensure you have your oven’s model number readily available when ordering to guarantee compatibility. Prioritize genuine NuWave parts for optimal performance and safety.

Warranty Information

NuWave Infrared Ovens are generally covered by a limited manufacturer’s warranty, though specific terms can vary depending on the model and purchase date. It’s crucial to retain your proof of purchase, as this is typically required to initiate a warranty claim.

The standard warranty usually covers defects in materials and workmanship for a defined period, often one year from the original purchase date. This coverage typically includes repair or replacement of defective parts, at NuWave’s discretion. However, the warranty does not cover damage resulting from misuse, accidents, or unauthorized repairs.

To file a warranty claim, contact NuWave’s customer support department directly. Be prepared to provide your model number, serial number, proof of purchase, and a detailed description of the issue. Carefully review the complete warranty documentation included with your oven for specific exclusions and limitations. Extended warranties may also be available for purchase.

throne of the four winds heroic guide

Throne of the Four Winds Heroic Guide: An Overview

Throne of the Four Winds presents a two-boss raid, accessible to 10 and 25 players, offering Normal and Heroic difficulties. This guide details heroic strategies,
loot, and achievements!

Prepare for unique mechanics demanding precise coordination within the Conclave of Wind and against Al’Akir, rewarding players with item level 359 and 372 gear.

Raid Overview & Accessibility

Throne of the Four Winds, located in the Storm Peaks of Northrend, is a raid introduced in World of Warcraft: Cataclysm Classic. It features two distinct encounters: the Conclave of Wind and Al’Akir the Windmaster. While relatively concise with only two bosses, the raid presents a significant challenge, particularly on Heroic difficulty.

The raid is designed for both 10-player and 25-player groups, offering scalability to accommodate various guild sizes. Accessibility is a key feature, making it a popular choice for guilds progressing through Cataclysm Classic content. Players can access the raid through the portal located within the Storm Peaks, requiring completion of specific introductory quests to unlock.

Heroic mode significantly increases the difficulty of both encounters, demanding tighter coordination, precise execution of mechanics, and optimized raid compositions. Successful completion of Heroic difficulties yields superior rewards, including higher item-level gear and exclusive achievements. The raid offers Armor Tokens and Essence of the Forlorn, a currency used to purchase gear with item levels 359 and 372.

Quick Facts & Difficulty Modes

Throne of the Four Winds boasts a streamlined raid experience with just two boss encounters, making it a focused challenge for guilds. The raid is available in both 10-player and 25-player sizes, catering to diverse guild structures. Expect a concentrated test of raid coordination and individual player skill.

Two difficulty modes are offered: Normal and Heroic. Normal mode provides a solid introduction to the raid’s mechanics, suitable for guilds learning the encounters. Heroic mode, however, dramatically increases the complexity, introducing altered boss abilities, tighter timing windows, and increased damage output.

Rewards scale with difficulty. Normal mode yields item level 359 gear, while Heroic mode offers the potential for item level 372 gear. The raid also features Armor Tokens and Essence of the Forlorn, a unique currency for purchasing upgrades. Mastering Heroic mode is crucial for acquiring the best possible gear from this raid.

Entrance Location & Requirements

The entrance to Throne of the Four Winds is conveniently located in the Storm Peaks, specifically within the Ulduar complex. Players will find the raid portal nestled amongst the ruins, easily accessible after completing the necessary prerequisites. It’s a relatively straightforward journey, minimizing travel time and maximizing raid efficiency.

There are minimal level requirements to enter, making it accessible to a wide range of players who have progressed through the Cataclysm content. However, gearing is strongly recommended, particularly for Heroic difficulty. A solid item level will significantly improve survivability and contribute to successful encounter completions.

No specific quests are required to access the raid, but completing associated zone quests in the Storm Peaks can provide valuable insight into the lore and context of the encounters. Furthermore, understanding the raid’s mechanics is paramount; thorough preparation is key to overcoming the challenges within.

Raid Quests & Progression

Throne of the Four Winds features a streamlined questing experience, primarily focused on unlocking the raid itself and providing context for the encounters within. While not extensive, these quests offer a narrative thread and reward players with valuable items and insights.

The initial questline typically involves investigating disturbances in the Storm Peaks, leading players to the doorstep of the raid instance. Completing these quests isn’t strictly necessary for entry, but they enhance the overall experience and provide a sense of progression.

Within the raid, there aren’t extensive quest chains tied to each boss; Instead, defeating the Conclave of Wind and Al’Akir unlocks achievements and allows players to acquire loot. The primary progression system revolves around improving gear through repeated clears and utilizing the Essence of the Forlorn currency to purchase upgrades.

Remember to check your quest log for any available tasks related to the raid!

Conclave of Wind: Heroic Strategy

The Conclave of Wind encounter challenges players with Anshal, Rohash, and Nezir. Mastering positioning, understanding abilities, and coordinating effectively are crucial for heroic success!

The Conclave of Wind presents a unique three-boss encounter, demanding adaptability and precise execution. Players will face Anshal, the windwalker; Rohash, the stormcaller; and Nezir, the tempest. Each boss possesses distinct abilities and mechanics that contribute to the overall challenge.

Anshal initiates the fight, focusing on positioning and avoiding his sweeping attacks. Transitioning to Rohash requires quick adjustments to handle his powerful storm-based abilities and targeted mechanics. Finally, Nezir tests the raid’s ability to navigate chaotic windstorms and maintain awareness of the surrounding environment.

Successfully overcoming the Conclave of Wind on Heroic difficulty necessitates a thorough understanding of each boss’s phases, coordinated movement, and effective communication. Ignoring any single aspect can quickly lead to a wipe, emphasizing the importance of preparation and teamwork. This encounter is a true test of raid coordination!

Phase 1: Anshal ー Positioning & Abilities

Anshal, the first phase of the Conclave of Wind, emphasizes strategic positioning and awareness of his sweeping attacks. Players must maintain a spread formation to minimize the impact of his Wind Shear, a frontal cone ability dealing significant damage. Careful attention to his casting direction is crucial for survival.

Gusting Winds will knock players back, requiring quick reactions and awareness of the arena edges. Cyclone targets individual players, removing them from the fight temporarily – healers should prepare for potential damage spikes upon release. Whirlwind is a channeled ability; interrupting it is a high priority for the raid.

Effective tank positioning is vital to ensure Anshal faces away from the raid, mitigating Wind Shear damage. Ranged DPS should maximize distance while maintaining uptime, and melee DPS must be prepared to move quickly to avoid frontal attacks. Mastering this phase sets the foundation for success!

Phase 2: Rohash ー Mechanics & Counterplay

Rohash introduces a complex phase centered around Static Orb management and avoiding Chain Lightning. Players will be targeted with Static Orb, requiring swift movement to avoid grounding it near others. Grounding the orb too close results in a damaging chain reaction, potentially wiping the raid.

Chain Lightning jumps between players, increasing in damage with each bounce. Assigning a dedicated “chain” player and utilizing defensive cooldowns strategically is essential. Rohash also casts Electromagnetic Pulse, silencing spellcasters and requiring melee to take the forefront.

Prioritize interrupting Overload, a powerful attack that can quickly overwhelm the raid. Maintaining raid awareness and clear communication are paramount during this phase. Successful counterplay relies on coordinated movement, precise timing, and effective use of defensive abilities.

Phase 3: Nezir ─ Avoiding the Storms

Nezir’s final phase is a frantic dance with swirling storms and escalating chaos. The primary mechanic revolves around avoiding Wind Shear, a frontal cone attack that instantly kills players caught within its path. Nezir rotates frequently, demanding constant repositioning and awareness of his facing.

He also casts Tempest, creating localized storm clouds that inflict heavy damage over time. Players must quickly move out of these clouds to minimize damage intake. Watch for Eye of the Storm, a targeted ability that requires immediate interruption to prevent a raid-wide wipe.

Successful navigation of this phase hinges on quick reflexes, precise movement, and clear callouts. Assigning players to track Nezir’s rotation and warn of incoming attacks is crucial. Mastering the timing of dodges and interrupts is key to surviving the onslaught.

Heroic Specific Changes ─ Conclave of Wind

Heroic Conclave of Wind significantly amplifies the encounter’s difficulty through increased boss health, damage output, and altered ability timings. Anshal’s Living Gale now has a shorter cast time, demanding quicker reactions from the raid. Rohash’s Stone Grip ability pulls more players, requiring tighter coordination to break free.

Most notably, Nezir’s storm mechanics are intensified. Wind Shear has a wider cone and reduced warning time, making it far more punishing. The frequency of Tempest increases, covering a larger area and demanding constant movement. Interrupting Eye of the Storm becomes paramount, as its failure results in swift raid annihilation.

These changes necessitate flawless execution of mechanics, precise positioning, and unwavering focus. Heroic Conclave demands a highly coordinated raid with experienced players capable of adapting to the increased pressure.

Recommended Raid Composition

A balanced raid composition is crucial for success in Throne of the Four Winds on Heroic difficulty. We recommend a core group of 5 tanks, allowing for flexible swapping during Al’Akir’s platform phase. Healing should consist of at least 6 healers, prioritizing classes with strong raid healing capabilities to counter the sustained damage.

Damage dealers should be a mix of melee and ranged, with a slight emphasis on ranged DPS for Nezir’s encounter. Bring at least 3-4 classes with strong interrupt capabilities to handle Nezir’s Eye of the Storm. Classes offering mobility buffs are highly valuable for navigating the dynamic platform during Al’Akir.

Consider including a dedicated raid leader and assign clear roles for coordinating interrupts, tank swaps, and positioning. Communication is key! A well-coordinated raid will significantly increase your chances of conquering this challenging encounter.

Al’Akir: Heroic Strategy

Al’Akir presents a three-phase encounter demanding precise coordination. Players must manage wind charges, avoid the deadly beam, and strategically position for lightning rods.

Success relies on swift reactions and effective communication throughout each dynamic phase of this challenging heroic battle.

Phase 1: The Platform & Wind Charges

The initial phase of the Al’Akir encounter centers around managing the platform and accumulating Wind Charges. Players must remain on the central platform, as falling results in instant death. Al’Akir periodically empowers players with Wind Charges, stacking up to ten. These charges are crucial for the subsequent phases, but excessive accumulation is dangerous.

At five and ten stacks, players are struck by lightning, dealing significant damage. To mitigate this, players should jump into one of the four wind tunnels surrounding the platform when reaching these thresholds. These tunnels safely discharge the excess charges. Coordination is key; tunnels can become overcrowded, leading to increased damage from the resulting static buildup.

The raid leader should call out tunnel assignments to ensure even distribution. Ignoring the charge mechanic will quickly lead to wipes. Additionally, Al’Akir casts “Sweeping Wind,” knocking players towards the edge, requiring careful positioning and awareness. Maintaining a tight formation while managing charges is paramount for success in this initial phase.

Phase 2: The Eye of Al’Akir ─ Avoiding the Beam

Phase two introduces Al’Akir’s devastating Eye Beam attack. The boss ascends, and a large, telegraphed beam sweeps across the platform. This beam inflicts massive damage and instant death to anyone caught within its path. Players must react swiftly and precisely to avoid it.

The beam’s trajectory is predictable, but requires constant vigilance. Players should utilize the safe spots indicated by the remaining platform sections not covered by the beam. Movement is crucial; standing still guarantees a fatal outcome. The raid needs to spread out to minimize the risk of multiple players being hit simultaneously.

Communication is vital during this phase. Callouts can help players anticipate the beam’s direction and adjust their positioning accordingly. Successfully navigating the Eye Beam requires quick reflexes, spatial awareness, and a coordinated raid response. Failing to dodge the beam will quickly deplete the raid’s resources and lead to a wipe.

Phase 3: Lightning Rods & Coordination

The final phase of the Al’Akir encounter centers around Lightning Rods. Al’Akir periodically summons these rods, which attach to random raid members. These players become conduits for powerful lightning strikes, threatening the entire raid if not handled correctly.

Affected players must quickly move away from the group, spreading out to prevent chain lightning from jumping to others. Designated “soakers” – typically tanks or durable DPS – should intercept the lightning, mitigating the damage. Precise positioning and swift reactions are paramount.

Coordination is key; the raid must communicate effectively to identify rod carriers and ensure they move to safe locations. Ignoring the rods results in overwhelming raid damage and almost certain defeat. Mastering this phase demands a well-organized raid and a clear understanding of individual responsibilities.

Successful execution hinges on quick thinking and flawless teamwork.

Heroic Specific Changes ー Al’Akir

The Heroic version of the Al’Akir encounter significantly amplifies the difficulty across all phases. Phase 1 sees increased wind charge frequency, demanding tighter platform control and quicker reactions to avoid being knocked off.

Phase 2’s Eye of Al’Akir beam now rotates faster and has a reduced warning time, requiring exceptional movement and awareness. The beam’s damage is also substantially higher, necessitating defensive cooldown usage.

Most critically, Phase 3’s Lightning Rods are more numerous and have a shorter duration before exploding. This necessitates even faster movement from affected players and more precise coordination from the raid to avoid catastrophic damage.

Furthermore, Al’Akir gains a new ability: a raid-wide silence during the Lightning Rod phase, disrupting communication and adding another layer of complexity. Overcoming these changes requires impeccable execution and a highly coordinated raid team.

Loot & Rewards from Throne of the Four Winds

Throne of the Four Winds offers a compelling reward structure for both Normal and Heroic difficulties. Players can acquire item level 359 gear from Normal mode, providing a substantial upgrade for those progressing through Cataclysm content.

However, the true rewards lie within the Heroic difficulty, granting access to item level 372 gear. This gear is highly sought after, offering significant stat improvements and preparing players for future challenges.

Beyond direct gear drops, the raid features Armor Tokens, allowing players to purchase specific pieces they may have missed. A unique currency, Essence of the Forlorn, is also awarded, used to acquire additional gear with the highest item levels.

Completing the raid also contributes to various achievements and meta-achievements, offering cosmetic rewards and titles for dedicated players. The combination of powerful gear and prestigious achievements makes Throne of the Four Winds a rewarding experience.

Achievements & Meta-Achievements

Throne of the Four Winds boasts a collection of achievements designed to test a raid group’s skill and coordination. These range from defeating bosses within specific time limits to completing encounters with unique restrictions, offering a substantial challenge beyond simply clearing the content.

Individual achievements reward players for mastering specific mechanics or roles during the encounters, showcasing personal accomplishment. However, the true prestige lies within the meta-achievements.

Completing all achievements within the raid unlocks the Throne of the Four Winds meta-achievement, granting a unique mount and title, signifying mastery of the raid. These rewards are highly coveted within the World of Warcraft community.

These achievements aren’t merely cosmetic; they demonstrate a deep understanding of the raid’s mechanics and a commitment to teamwork. Earning these accolades solidifies a player’s reputation as a skilled raider within Cataclysm Classic.

the thing around your neck pdf

The Discontinuation of Viaplay in Poland & Transition to MEGOGO

Viaplay officially ceased direct operations in Poland on June 29th‚ 2020‚ transferring its content to MEGOGO on November 10th‚ 2020‚ ensuring continued access for subscribers.

Historical Context of Viaplay’s Polish Launch

Viaplay’s entry into the Polish streaming market aimed to capitalize on the growing demand for diverse content‚ particularly sports and Nordic noir series. Launching with an ambitious library of approximately 1200 titles‚ the service initially presented a compelling offering. However‚ this expansive catalog quickly diminished‚ dwindling to a range of 200-300 titles over time‚ a shift largely unaddressed through price adjustments.

The initial strategy focused on securing exclusive rights to popular sports leagues like the Premier League‚ Bundesliga‚ and European competitions‚ alongside a selection of original and acquired films and series. Despite this initial push‚ Viaplay struggled to gain significant traction‚ ultimately leading to its operational exit from Poland and a transition to a content provision model through MEGOGO.

Initial Content Offering (Peak: ~1200 Titles)

At its peak‚ Viaplay boasted a substantial content library of around 1200 titles‚ designed to attract a broad Polish audience. This included a diverse range of films‚ series‚ and crucially‚ live sports coverage; The platform heavily promoted its exclusive broadcasting rights to major football leagues – the Premier League‚ Bundesliga‚ Europa League‚ and Conference League – as a key differentiator.

Beyond sports‚ Viaplay aimed to establish itself with quality Nordic dramas and internationally recognized series. This initial offering represented a significant investment in content acquisition‚ intending to position Viaplay as a premium streaming service. However‚ maintaining this extensive catalog proved unsustainable‚ leading to a substantial reduction in available titles in subsequent periods.

Decline in Content Library (200-300 Titles)

Over time‚ Viaplay’s content offering in Poland experienced a dramatic reduction‚ dwindling from an initial peak of approximately 1200 titles to a significantly smaller range of 200-300. Despite this substantial decrease in available content‚ the pricing structure remained largely unchanged‚ a point of contention for many subscribers. This disparity between cost and value contributed to growing dissatisfaction and ultimately‚ the platform’s struggles in the Polish market.

The decline wasn’t widely publicized‚ with many subscribers unaware of the extent of the content loss‚ relying on external sources like upflix.pl to track changes. This lack of transparency further eroded trust and fueled negative perceptions of the service’s quality and commitment to its user base.

Reasons for Viaplay’s Failure in Poland

Viaplay’s Polish venture proved a “total flop” due to poor quality‚ a weak image‚ and an inability to deliver consistent value to its subscribers.

Pricing Strategy & Perceived Value

Viaplay’s pricing remained stagnant despite a dramatic reduction in content‚ falling from an initial peak of approximately 1200 titles to a meager 200-300. This disconnect between cost and offering significantly impacted perceived value for subscribers. The service failed to adjust pricing to reflect the diminishing library‚ leading to widespread dissatisfaction.

Customers felt they weren’t receiving adequate entertainment for their money‚ especially when compared to competitors offering more extensive catalogs at similar or lower price points. This ultimately contributed to subscriber churn and the service’s eventual withdrawal from the Polish market‚ highlighting the importance of aligning price with content quality and quantity.

Lack of Consistent New Content Releases

A significant issue plaguing Viaplay Poland was the infrequent addition of fresh content. The last major series release‚ “Morderczynie‚” premiered a year before the service’s departure‚ quickly migrating to competing platforms like Netflix and Player.pl. This rapid transfer to rivals underscored Viaplay’s inability to retain exclusive content and maintain subscriber engagement.

The absence of consistent new releases created a sense of stagnation‚ discouraging both new sign-ups and renewals. Subscribers perceived the platform as lacking investment in fresh programming‚ further diminishing its appeal. This pattern contributed to the overall decline in perceived value and ultimately hastened the decision to transition content to MEGOGO rather than continue independent operations.

Competition from Established Streaming Services

Viaplay Poland faced intense competition from deeply entrenched streaming giants‚ possessing larger content libraries and established brand recognition. Netflix‚ Player.pl‚ and HBO Max already commanded significant market share‚ offering a wider variety of programming and often‚ more competitive pricing structures. This pre-existing landscape made it exceedingly difficult for Viaplay to carve out a substantial subscriber base.

The swift migration of “Morderczynie” to platforms like Netflix and Player.pl exemplifies this competitive pressure. Subscribers readily shifted to services already providing a broader range of options. Viaplay’s limited content‚ coupled with its pricing‚ proved insufficient to overcome the advantages held by these established players‚ ultimately contributing to its failure in the Polish market.

The Transition to MEGOGO

MEGOGO became the content provider for former Viaplay subscribers‚ maintaining the “Viaplay Filmy i Seriale” offer as an add-on for approximately 15-20 zł.

MEGOGO as a Content Provider for Former Viaplay Subscribers

Following Viaplay’s departure from the Polish market‚ MEGOGO stepped in to ensure continued access to content for existing subscribers. This transition‚ effective November 10th‚ 2020‚ wasn’t a complete overhaul but rather a continuation of service under a new provider. MEGOGO essentially absorbed the “Viaplay Filmy i Seriale” library‚ offering it as an add-on package to their existing services.

This arrangement allowed viewers to still enjoy the films and series they were accustomed to through Viaplay‚ albeit through a different platform. The key was maintaining accessibility and minimizing disruption for those who had already invested in a Viaplay subscription‚ even if indirectly through operators like Play.

Maintaining the Viaplay Filmy i Seriale Offer

MEGOGO’s core strategy revolved around preserving the “Viaplay Filmy i Seriale” content catalogue‚ recognizing its value to former Viaplay subscribers. Rather than a complete restructuring‚ MEGOGO offered this specific library as an add-on to their existing subscription tiers. This allowed customers to continue accessing their preferred films and series without interruption‚ albeit through a different service provider.

The pricing for this add-on was positioned around 15-20 złoty‚ making it a relatively affordable option for those wishing to retain access to the Viaplay content. This approach minimized churn and provided a seamless transition‚ ensuring that the investment made by subscribers wasn’t entirely lost with Viaplay’s exit from Poland.

Pricing of Viaplay Content via MEGOGO (Approx. 15-20 zł as an Add-on)

Following Viaplay’s departure‚ MEGOGO strategically priced the “Viaplay Filmy i Seriale” package as an add-on to existing MEGOGO subscriptions‚ falling within the 15-20 złoty range. This positioning aimed to appeal to former Viaplay users seeking continued access to familiar content without committing to a completely new‚ full-priced streaming service. The add-on model allowed flexibility‚ catering to viewers who primarily valued the Viaplay library.

This pricing structure was crucial for retention‚ offering a cost-effective solution compared to subscribing to multiple independent platforms. It also presented an attractive option for MEGOGO subscribers looking to expand their viewing choices. The affordability of the add-on was a key factor in mitigating subscriber loss during the transition period.

Specific Content Previously Available on Viaplay

Viaplay prominently featured live sports – Premier League‚ Bundesliga‚ and European competitions – alongside the series “Morderczynie‚” which later moved to Netflix and Player.

Live Sports Coverage (Premier League‚ Bundesliga‚ European Competitions)

A key draw for Viaplay subscribers was its extensive live sports coverage. The platform secured rights to broadcast the prestigious English Premier League‚ offering fans access to every match live. Similarly‚ German Bundesliga matches were also a significant part of the offering‚ catering to a dedicated football audience.

Beyond these leagues‚ Viaplay also provided live coverage of various European football competitions‚ including the UEFA Europa League and the UEFA Europa Conference League. This comprehensive sports package was a major selling point during Viaplay’s initial launch and contributed to attracting a substantial subscriber base. However‚ the loss of this content with Viaplay’s departure impacted sports fans in Poland.

Notable Series: “Morderczynie” & its Subsequent Availability on Other Platforms

“Morderczynie” (The Killers) was a prominent original series featured on Viaplay Poland‚ gaining some recognition amongst viewers. However‚ its lifecycle on Viaplay was relatively short-lived. Just a month after its premiere‚ the series became available on Netflix‚ diminishing its exclusivity and value for Viaplay subscribers.

Following its stint on Netflix‚ “Morderczynie” further circulated to Player.pl‚ another Polish streaming platform. This rapid distribution across multiple services highlighted a pattern of Viaplay’s content quickly becoming available elsewhere‚ contributing to the perception of limited long-term value for a standalone Viaplay subscription. The series’ journey exemplifies the challenges Viaplay faced in retaining exclusive content.

Customer Support & Cancellation Issues

Viaplay faced criticism regarding subscription cancellations‚ as exemplified by a case with Canal+ in October 2024‚ where initial claims were ultimately overturned with a concession.

Handling of Viaplay Subscription Cancellations (Case Study: Canal+)

A specific case involving a Canal+ subscriber highlights issues with Viaplay’s cancellation process. The customer initially submitted a cancellation request on October 7th‚ 2024‚ but it was initially denied by Viaplay. Despite this rejection‚ acknowledging a positive prior relationship‚ Viaplay ultimately conceded to the cancellation request.

This instance suggests inconsistencies in handling cancellations‚ potentially leading to frustration for customers attempting to end their subscriptions. The initial denial‚ followed by a concession based on relationship history‚ points to a lack of standardized procedures. It raises questions about the fairness and transparency of Viaplay’s cancellation policies during its operational period in Poland‚ and the difficulties customers faced when trying to terminate their services.

Customer Complaints Regarding Service Quality

Viaplay in Poland faced significant criticism regarding its overall service quality‚ contributing to its eventual withdrawal from the market. Complaints centered around a perceived decline in content availability‚ particularly after an initial offering of around 1200 titles dwindled to just 200-300. Despite this substantial reduction‚ pricing remained unchanged‚ leading to accusations of poor value for money.

Users expressed frustration over the infrequent release of new content‚ with the series “Morderczynie” being a recent example‚ quickly migrating to competing platforms like Netflix and Player. This pattern reinforced the feeling that Viaplay wasn’t investing sufficiently in fresh programming. These issues‚ combined with difficulties in cancelling subscriptions‚ fostered widespread dissatisfaction among Polish viewers.

Promotional Offers & Partnerships

Viaplay leveraged promotions within the Play network‚ aiming to attract subscribers. Potential future bundling options with other operators remained a possibility before its exit from Poland.

Viaplay Promotions within the Play Network

Viaplay actively pursued promotional opportunities through partnerships‚ most notably with the Play network in Poland. These promotions aimed to increase subscriber acquisition and brand visibility within the Polish market. Details regarding specific promotional offers‚ such as discounted subscription rates or bundled packages with Play’s mobile or internet services‚ were frequently advertised to Play customers.

The collaboration with Play was a key strategy for Viaplay‚ leveraging Play’s established customer base and distribution channels. However‚ despite these promotional efforts‚ Viaplay ultimately struggled to gain sufficient traction and maintain a sustainable presence in Poland. The effectiveness of these promotions was likely hampered by the declining content library and perceived value proposition‚ ultimately contributing to the service’s discontinuation as a standalone entity.

Potential Future Partnerships & Bundling Options

Following Viaplay’s exit as a direct operator in Poland‚ the possibility of future partnerships and bundling options remained open‚ primarily centered around MEGOGO’s continued provision of the “Viaplay Filmy i Seriale” content. Operators might explore integrating this content package into their existing subscription tiers‚ offering customers access to Viaplay’s former library as an add-on.

Such bundling strategies could enhance the value proposition of competing services and attract subscribers seeking specific titles previously exclusive to Viaplay. While no concrete announcements have been made as of December 31‚ 2025‚ the model of offering “Viaplay Filmy i Seriale” as a supplementary package through other providers appears to be the most likely path for continued content availability in Poland‚ capitalizing on existing infrastructure and customer relationships.

Current Status (as of December 31‚ 2025)

Viaplay’s direct operations in Poland ended on June 29th‚ 2020‚ with content now exclusively available through MEGOGO since November 10th‚ 2020.

Official End of Viaplay’s Direct Operations in Poland (June 29th‚ 2020)

Viaplay’s Polish venture concluded on June 29th‚ 2020‚ marking a definitive end to its independent streaming service within the country. The service‚ launched with initial ambitions‚ ultimately failed to gain sufficient traction in the competitive Polish market. This decision wasn’t presented as a temporary pause‚ but rather a complete withdrawal of Viaplay’s direct operational presence.

The closure stemmed from a combination of factors‚ including a declining content library – dwindling from an initial peak of approximately 1200 titles to a mere 200-300 – and a perceived lack of value for the subscription price. Despite the service offering live sports like the Premier League and Bundesliga‚ it proved insufficient to retain a substantial subscriber base. This ultimately led to the strategic shift towards partnering with MEGOGO.

Availability of Content Through MEGOGO (November 10th‚ 2020)

Following Viaplay’s exit‚ MEGOGO stepped in on November 10th‚ 2020‚ to ensure continued access to the Viaplay Filmy i Seriale content library for former subscribers. This transition wasn’t a complete overhaul‚ but rather a continuation of the existing offering under a new provider. MEGOGO essentially became the platform for delivering the content previously housed on Viaplay‚ mitigating disruption for viewers.

The arrangement allowed subscribers to maintain access to films and series‚ albeit as an add-on to MEGOGO’s existing services. This add-on was priced approximately between 15-20 złoty. The goal was to provide a seamless experience‚ preserving the content that Viaplay subscribers valued‚ while adapting to the changing market dynamics and Viaplay’s strategic shift away from direct Polish operations.

munsell color chart soil pdf

The Munsell Soil Color Chart‚ often available as a PDF‚ provides a standardized system for soil description.
It’s a crucial tool‚ enabling consistent color identification across various disciplines.
These charts‚ like the 2009 revision‚ facilitate accurate soil surveying and mapping‚ offering a common language for professionals.

What is the Munsell Color System?

The Munsell Color System‚ foundational to soil science‚ organizes colors numerically based on three primary dimensions: hue‚ value‚ and chroma.
Originally developed for color matching‚ it was adapted for soil analysis‚ offering a standardized way to describe soil colors.
Munsell Soil Color Charts‚ frequently found as PDF downloads‚ visually represent this system.
This allows for precise communication and documentation of soil properties‚ crucial for fields like agriculture and environmental science.

Why Use a Soil Color Chart?

Soil Color Charts‚ like the Munsell system – often accessible as a PDF – are vital for consistent and objective soil description. They overcome the subjectivity of verbal color descriptions‚ ensuring reliable data.
These charts aid in soil surveying‚ mapping‚ and assessing soil health. Utilizing a standardized system‚ like Munsell‚ improves communication among scientists and facilitates accurate record-keeping for long-term monitoring.

Understanding the Munsell Chart Components

Munsell charts‚ frequently found as PDF downloads‚ organize soil color using three dimensions: Hue‚ Value‚ and Chroma.
These components define color‚ enabling precise soil characterization and analysis.

Hue: Identifying the Primary Color

Hue‚ on the Munsell Soil Color Chart – often accessed as a PDF – represents the dominant color‚ circling through red‚ yellow‚ green‚ blue‚ and purple.
Displayed around the outer edge‚ hue is denoted by combinations of letters and numbers (e.g.‚ 10R‚ 5G).
The charts systematically arrange these colors‚ allowing for accurate identification of the primary color present in a soil sample. Understanding hue is fundamental to soil description.

Value: Determining Lightness or Darkness

Value‚ on the Munsell Soil Color Chart – frequently found as a downloadable PDF – indicates the lightness or darkness of a color. Represented vertically on the chart‚ value ranges from 0 (black) to 10 (white).
A lower value signifies a darker soil‚ while a higher value indicates a lighter soil. Assessing value is crucial when using the chart for accurate soil characterization.

Chroma: Measuring Color Purity or Saturation

Chroma‚ within the Munsell Soil Color Chart – often accessed as a PDF document – defines the color’s purity or saturation. Displayed horizontally on the chart‚ chroma increases from neutral grays (0) to vivid‚ intense colors. Higher chroma values denote brighter‚ more saturated soil colors‚ while lower values indicate duller‚ less saturated hues. This is key for precise soil description.

The 2009 Revision of the Munsell Soil Color Charts

The 2009 Munsell Soil Color Charts represent significant improvements‚ often found as a downloadable PDF;
These revisions enhance color accuracy and clarity for better soil analysis and description.

Key Improvements in the Latest Revision

The 2009 revision of the Munsell Soil Color Charts‚ frequently accessed as a PDF‚ boasts enhanced color precision and reduced metamerism – minimizing color variation under different lighting.
Improvements include a more refined color space and better differentiation between hues‚ values‚ and chroma.
These updates facilitate more accurate soil descriptions‚ crucial for soil surveying‚ environmental monitoring‚ and agricultural assessments.
The PDF format ensures easy accessibility and distribution of these improved charts.

Availability of the 2009 Charts (PDF Format)

Munsell Soil Color Charts‚ specifically the 2009 revision‚ are readily available as PDF downloads from various online resources.
Numerous institutions and organizations offer free access to these essential soil science tools.
Alternatively‚ physical copies of the charts can be purchased from specialized soil science suppliers.
The PDF version allows for convenient digital access‚ printing‚ and portability for field work and soil analysis.

Navigating a Munsell Soil Color Chart

Munsell charts are navigated by matching soil samples to specific hue‚ value‚ and chroma combinations.
The PDF format allows digital comparison‚ aiding accurate soil description and analysis.

Locating Colors Based on Hue‚ Value‚ and Chroma

Locating colors on a Munsell Soil Color Chart‚ often accessed as a PDF‚ involves understanding its three dimensions. Hue identifies the primary color (red‚ yellow‚ blue‚ etc.)‚ arranged around a central neutral gray. Value indicates lightness‚ ranging from black to white. Chroma measures color purity or saturation – how vivid the color is.

Using the chart‚ you first find the appropriate hue page‚ then pinpoint the correct value and chroma based on visual comparison with your soil sample. The PDF version facilitates zooming for precise matching.

Using the Chart for Accurate Soil Description

Employing a Munsell Soil Color Chart – readily available as a PDF – ensures standardized and precise soil descriptions; Begin by matching your soil sample to the closest color on the chart‚ noting the hue‚ value‚ and chroma. This provides a concise‚ objective color designation (e.g.‚ 10YR 6/4).

Consistent use of this system‚ even with the PDF format‚ minimizes subjectivity and facilitates clear communication among soil scientists and related professionals‚ improving data reliability.

Specific Munsell Color Ranges in Soil Science

Munsell charts detail specific hue ranges like 10R‚ 5G‚ and 10BG‚ crucial for soil classification. PDF versions showcase Gley colors‚ indicating waterlogging and redox conditions.

Common Hue Ranges Found in Soils (e.g.‚ 10R‚ 5G‚ 10BG)

Munsell soil color charts‚ frequently accessed as PDF documents‚ categorize soil hues into distinct families. Common ranges include 10R (reddish)‚ 5G (greenish-gray)‚ and 10BG (blue-green).

These hues reflect mineral composition and organic matter content. The charts systematically arrange colors‚ aiding in precise soil description. Understanding these ranges is vital for soil surveying‚ mapping‚ and environmental assessments. PDF versions allow for easy reference in the field.

Gley Colors and Their Significance

Gley colors‚ identifiable using a Munsell soil color chart – often found as a PDF – indicate prolonged water saturation and reducing conditions. These colors‚ typically grayish hues like 5G or 10BG‚ signify poor drainage and redox reactions within the soil.

Identifying gley colors is crucial in soil science‚ informing assessments of wetland boundaries and soil health. PDF versions of the chart facilitate field identification‚ aiding in environmental monitoring and land management decisions.

Downloading and Accessing Munsell Soil Color Charts

Munsell Soil Color Charts are readily available as free PDF downloads online‚ alongside options to purchase physical copies for field use and detailed analysis.

Free PDF Downloads and Online Resources

Numerous online platforms offer Munsell Soil Color Charts in PDF format for free download‚ providing convenient access for students‚ researchers‚ and professionals. These resources often include sections from various chart revisions‚ like the 2009 version.
Websites host downloadable files‚ enabling immediate access to color standards.
Furthermore‚ some sites provide interactive tools and guides to aid in color matching and soil description‚ supplementing the PDF charts.

Where to Purchase Physical Munsell Charts

While PDF versions offer accessibility‚ obtaining physical Munsell Soil Color Charts ensures the most accurate color matching‚ unaffected by screen variations. These charts are available through specialized soil science supply companies and geological survey stores.
Retailers like Forestry Suppliers and Ben Meadows offer complete chart sets and individual pages. Purchasing a physical copy provides a durable‚ field-ready reference‚ complementing digital PDF resources.

Applications of the Munsell Soil Color Chart

Munsell charts‚ including PDF versions‚ are vital for soil surveying‚ mapping‚ and agricultural assessments. They aid in understanding soil health and environmental monitoring efforts.

Soil Surveying and Mapping

Munsell Soil Color Charts‚ readily accessible as a PDF‚ are foundational in soil surveying and mapping projects. Accurate color determination‚ using these standardized charts‚ allows for consistent soil classification across large areas. This consistency is crucial for creating reliable soil maps‚ aiding in land use planning and resource management. The charts facilitate detailed soil descriptions‚ contributing to comprehensive soil databases. Professionals rely on these tools for precise documentation and communication regarding soil properties.

Agricultural Applications and Soil Health Assessment

The Munsell Soil Color Chart‚ often found as a convenient PDF‚ plays a vital role in agricultural practices. Soil color‚ determined using these charts‚ can indicate organic matter content and drainage. This information aids in assessing soil health and fertility‚ guiding fertilizer application and irrigation strategies. Farmers and agronomists utilize the charts for quick‚ field-based assessments‚ optimizing crop production and promoting sustainable land management. Accurate color identification supports informed decision-making in agriculture.

Environmental Science and Monitoring

In environmental science‚ the Munsell Soil Color Chart – readily accessible as a PDF – is invaluable for assessing soil conditions. Color variations‚ precisely identified using the chart‚ indicate redox potential and waterlogging‚ crucial for wetland delineation and monitoring. Environmental scientists employ these charts to detect pollution impacts and track restoration progress. The standardized color system ensures consistent data collection‚ supporting long-term environmental monitoring efforts and informed conservation strategies.

Limitations of Using the Munsell System

Despite its utility‚ the Munsell system has limitations. Color matching can be subjective‚ and lighting significantly influences perception‚ even with a PDF chart.

Subjectivity in Color Matching

Color perception isn’t uniform; individual observers may interpret shades differently‚ introducing subjectivity when using a Munsell Soil Color Chart‚ even a digital PDF version.
Factors like visual acuity and personal bias can lead to discrepancies in color identification.
While the system aims for standardization‚ human interpretation remains a variable.
Consistent training and careful observation are vital to minimize these subjective errors when describing soil samples using the chart.

Influence of Lighting Conditions

Accurate soil color assessment with a Munsell Soil Color Chart‚ whether a physical copy or a PDF viewed digitally‚ is heavily dependent on lighting.
Natural daylight is ideal‚ but artificial light sources can significantly alter perceived colors.
Variations in light temperature and intensity can lead to misidentification.
Standardized lighting conditions are crucial for reliable soil descriptions‚ minimizing errors when using the chart for analysis.

Munsell Color Chart and Soil Organic Matter

Soil color‚ assessed using a Munsell chart (often found as a PDF)‚ correlates with organic matter content.
Darker hues generally indicate higher organic matter levels within the soil profile.

Correlation Between Soil Color and Organic Matter Content

Utilizing the Munsell Soil Color Chart‚ frequently accessed as a PDF document‚ reveals a strong relationship between soil color and organic matter. Generally‚ increasing organic matter darkens soil‚ shifting hues towards lower values.
Specifically‚ 10YR and 5YR color families often indicate significant organic content.
However‚ mineral composition also influences color‚ so relying solely on color for estimation requires caution and experience. Accurate assessment necessitates referencing the chart alongside other soil analyses.

Using Color to Estimate Organic Matter Levels

The Munsell Soil Color Chart‚ readily available as a PDF‚ aids in estimating organic matter. Darker soil colors – lower values like 2/1 or 3/1 – suggest higher organic matter content.
However‚ this is a preliminary assessment.
Charts show that 10YR and 5YR hues‚ with low values‚ are commonly associated with rich organic soils.
Remember‚ accurate determination requires laboratory analysis‚ but the chart provides a useful field indication.

Detailed Examination of Chart Sections (e.g.‚ 5YR)

The 5YR section of the Munsell Soil Color Chart‚ often found in PDF format‚ displays reddish-yellow hues.
It showcases variations in value and chroma‚ crucial for precise soil identification.

Understanding the 5YR Color Family

The 5YR color family within the Munsell Soil Color Chart‚ frequently accessed as a PDF‚ represents a range of reddish-yellow hues. This section is vital for soil scientists‚ displaying colors from light yellowish-red (5YR 8/8) to dark reddish-brown (5YR 3/2).

Understanding the chart’s organization within 5YR is key; value indicates lightness‚ while chroma denotes color purity. Variations within this family often signify differing organic matter content or iron oxide levels in the soil. Accurate identification relies on careful comparison with the chart.

Value and Chroma Variations within 5YR

Within the 5YR family of the Munsell Soil Color Chart (often found as a PDF)‚ value and chroma create a nuanced spectrum. Value‚ ranging from 8/0 (very light) to 4/0 (dark)‚ indicates lightness. Chroma‚ from 0/0 (neutral gray) to 8/0‚ signifies color intensity.

Higher chroma values in 5YR indicate brighter‚ more vivid reddish-yellows‚ while lower values lean towards browns. These variations‚ detailed in the chart‚ help differentiate soil types and assess properties like drainage and organic matter content‚ crucial for accurate soil description.

The Role of Chroma in Soil Texture Identification

Chroma‚ on the Munsell Soil Color Chart (available as a PDF)‚ correlates with particle size; lower chroma often indicates finer textures.
Analyzing soil’s color helps estimate composition.

How Chroma Relates to Particle Size

Chroma‚ a key component of the Munsell Soil Color Chart – frequently accessed as a PDF – demonstrates a strong relationship with soil particle size. Generally‚ soils with higher chroma values tend to indicate coarser textures‚ like sands‚ due to improved aeration and drainage. Conversely‚ lower chroma values often suggest finer textures‚ such as clays‚ where reduced drainage and increased organic matter content dull the color.

This connection arises because particle size influences the soil’s ability to reflect light. Utilizing the chart effectively aids in preliminary texture assessment.

Using Chroma as an Indicator of Soil Composition

Chroma‚ within the Munsell Soil Color Chart – often found as a downloadable PDF – serves as a valuable indicator of soil composition. Higher chroma values frequently suggest a prevalence of well-drained mineral components‚ while lower chroma often points to the presence of organic matter or iron oxides.

Analyzing color alongside the chart helps determine the relative abundance of these constituents‚ offering insights into the soil’s overall chemical and physical makeup. This is a crucial step in soil assessment.

Munsell Color and Soil Drainage

Soil color‚ using a Munsell chart (available as a PDF)‚ indicates drainage. Gley colors suggest waterlogging‚ while brighter hues imply better aeration and drainage capacity.

Color as an Indicator of Waterlogging and Redox Potential

Soil color‚ assessed using a Munsell Soil Color Chart – often found as a downloadable PDF – directly reflects redox potential and waterlogging. Prolonged saturation reduces oxygen‚ shifting colors towards gray (gley colors).

These hues‚ detailed within the chart‚ indicate iron reduction. Lower chroma values‚ particularly in the 10YR and 5YR families‚ signify poor drainage. Conversely‚ brighter‚ higher chroma colors suggest well-aerated conditions. Accurate color matching with the chart is vital for interpreting soil conditions.

Identifying Gleyed Soils Based on Color

Gleyed soils‚ indicative of prolonged waterlogging‚ are readily identified using a Munsell Soil Color Chart‚ frequently accessible as a PDF. These soils exhibit characteristic gray hues‚ often within the 10BG‚ 5BG‚ and 5G color families detailed on the chart.

Low chroma values are crucial indicators; a color of 1/1 or 1/2 suggests significant reduction. The chart helps differentiate gleyed horizons from naturally gray soils‚ aiding accurate soil classification and assessment of drainage conditions.

Comparing Munsell to Other Soil Color Systems

Munsell’s standardized color chart‚ often found as a PDF‚ offers advantages in objectivity compared to older systems. While alternatives exist‚ Munsell remains widely adopted for soil analysis.

Advantages of the Munsell System

The Munsell Soil Color Chart‚ readily accessible as a PDF‚ boasts several key advantages. Its standardized‚ visually arranged color chips minimize subjectivity in soil description‚ fostering consistency among observers. Unlike purely descriptive methods‚ Munsell provides a numerical color notation (hue‚ value‚ chroma) for precise record-keeping.

Furthermore‚ the system’s widespread adoption ensures a common language for soil scientists globally. The availability of PDF versions enhances accessibility‚ allowing for convenient field reference. This standardization is invaluable for soil surveying‚ mapping‚ and comparative studies.

Disadvantages of the Munsell System

Despite its strengths‚ the Munsell Soil Color Chart‚ even in PDF format‚ has limitations. Subjectivity remains a factor‚ as individual perception of color can vary. Lighting conditions significantly influence color matching; inconsistent illumination compromises accuracy.

The discrete nature of the chart means a precise soil color may fall between chips‚ requiring estimation; While PDF versions offer portability‚ they lack the tactile experience of physical charts. Reliance on visual comparison can be challenging for individuals with color vision deficiencies.

Resources for Further Learning

Munsell Soil Color Chart information‚ including PDF downloads‚ is available through online tutorials and guides. Explore relevant publications and research papers for deeper understanding.

Online Tutorials and Guides

Numerous online resources offer guidance on utilizing the Munsell Soil Color Chart‚ often featuring downloadable PDF versions for reference. These tutorials demonstrate how to accurately match soil samples to chart colors‚ explaining hue‚ value‚ and chroma.

Websites and educational platforms provide step-by-step instructions‚ aiding in precise soil description for various applications. PDF guides simplify navigation and color identification‚ enhancing understanding of this vital soil science tool.

Relevant Publications and Research Papers

Scientific literature extensively references the Munsell Soil Color Chart‚ with many studies available as PDF downloads. These publications detail applications in soil surveying‚ environmental science‚ and agricultural assessments.

Research papers explore correlations between soil color‚ organic matter content‚ and drainage characteristics‚ utilizing the Munsell system for standardized data. Accessing these resources provides deeper insight into the chart’s methodology and practical implications.

f100 builders guide

F100 Builders Guide: A Comprehensive Overview (Updated 12/16/2025)

This guide details F100 builds, covering chassis options like Art Morrison and Fat Fender Garage, alongside bodywork, engines, and interior modifications.

The Ford F100, produced from 1953 to 1972, represents a cornerstone of American automotive history and a beloved platform for custom builds. Originally designed as a robust work truck, the F100’s simple yet durable construction lends itself remarkably well to restomod and pro-touring projects. Its classic styling, combined with readily available parts and a thriving aftermarket, makes it an ideal choice for builders of all skill levels.

This guide focuses on navigating the world of F100 customization, from foundational chassis swaps offered by companies like Art Morrison and Fat Fender Garage, to comprehensive bodywork and modern drivetrain upgrades. Whether you’re aiming for a meticulously restored original or a high-performance restomod, understanding the F100’s inherent strengths and potential challenges is crucial for a successful build. Prepare to delve into a journey of restoration and modification!

Why Choose an F100 for a Build?

The F100 offers a unique blend of classic aesthetics, mechanical simplicity, and aftermarket support, making it a compelling choice for builders. Its iconic styling evokes a strong sense of nostalgia, while the relatively straightforward design simplifies the restoration and modification process. Unlike some vintage vehicles, parts availability is excellent, with companies like LMC Truck specializing in F100 components.

Furthermore, the F100’s robust frame provides a solid foundation for performance upgrades, and the availability of complete chassis solutions from Art Morrison and Fat Fender Garage streamlines complex modifications. The truck’s inherent versatility allows for a wide range of build styles, from period-correct restorations to modern, high-performance machines. It’s a platform that rewards creativity and offers a rewarding building experience.

Understanding F100 Generations (1953-1972)

The F100 spanned several generations, each with distinct styling and mechanical features. The first generation (1953-1956) boasts a timeless design and is highly sought after for restorations. The second generation (1957-1960) introduced a wraparound windshield and updated trim. The third generation (1961-1966) featured a more refined appearance with integrated headlights, while the fourth (1967-1972) offered increased cabin space and improved comfort.

Understanding these generational differences is crucial for sourcing correct parts and planning modifications. Early models often require more extensive restoration work, while later generations may offer advantages in terms of drivetrain compatibility and available upgrades. Knowing the specific year and series of your F100 will significantly simplify the build process.

Chassis Selection & Modification

Choosing a chassis involves evaluating factory limitations versus aftermarket options like Art Morrison or Fat Fender Garage for improved performance.

Factory Chassis Limitations

The original F100 chassis, while robust for its time, presents several limitations for modern performance builds. These trucks weren’t designed for high horsepower, advanced suspension geometry, or frequent hard braking. The factory frame, particularly on older models, can exhibit significant flex, impacting handling and structural integrity.

Rust is a common issue, weakening the frame and requiring extensive repair or replacement. The original suspension design is relatively basic, lacking the adjustability and sophistication of modern systems. Furthermore, the factory chassis may not accommodate wider tires or larger brakes without significant modification. Addressing these limitations often necessitates a complete chassis swap or substantial reinforcement and alteration of the existing frame to achieve desired performance and safety levels.

Aftermarket Chassis Options: Art Morrison

Art Morrison Enterprises offers a range of F100 chassis solutions, renowned for their quality and performance enhancements. Their GT Sport chassis, designed for 1953-1956 models, provides a fully independent front suspension and a robust four-link rear setup, dramatically improving handling and ride quality.

Customizable options allow builders to tailor the chassis to their specific engine and drivetrain choices. Art Morrison frames are typically constructed from high-strength steel, offering superior rigidity and durability compared to the factory frame. They also prioritize wheel and tire fitment, though variations can occur with modifications. These chassis aim to deliver a modern driving experience while retaining the classic F100 aesthetic.

Aftermarket Chassis Options: Fat Fender Garage

Fat Fender Garage (FFG) provides complete chassis solutions specifically engineered for F100 trucks, focusing on delivering a strong foundation for performance builds. Their chassis are designed to simplify the build process, offering a bolt-on solution that significantly upgrades the truck’s handling and structural integrity.

FFG chassis incorporate modern suspension geometry, often including independent front suspension and a four-link rear. They are built with attention to detail, ensuring compatibility with various components and offering a smooth ride. Resources like their website and social media channels provide guidance for purchasers. FFG aims to provide a comprehensive chassis package, streamlining the F100 restoration and modification journey.

Comparing Chassis Kits: Features and Benefits

When selecting a chassis kit, consider your build goals. Art Morrison offers customizable options, ideal for tailored performance, while Fat Fender Garage provides complete, ready-to-assemble solutions. Morrison’s kits often prioritize a high degree of adjustability and component choice, catering to experienced builders.

FFG kits excel in ease of installation and a more straightforward build process. Key benefits include improved ride quality, enhanced handling, and increased structural rigidity. Evaluate features like suspension type (IFS vs. solid axle), rear suspension design (four-link vs. leaf springs), and included components. Weigh the cost against the level of customization and support offered by each manufacturer.

Chassis Modification Considerations

Modifying a factory F100 chassis requires careful planning. Assess the existing frame for rust and structural integrity; extensive repairs might necessitate a full replacement. Short bed conversions, like those utilizing CPP components, demand precise cutting and welding skills. Ensure proper alignment and reinforcement after any alterations.

Consider the impact on suspension geometry and driveline angles. Modifications should accommodate desired wheel and tire sizes, avoiding rubbing or interference. Prioritize safety by using high-quality welding techniques and materials. Thoroughly research and understand the implications of each modification before proceeding, potentially consulting with experienced builders.

Suspension Systems

F100 suspension upgrades involve choices between IFS/solid axles, leaf springs/four-link setups, and shock/spring selection for optimal handling and ride quality.

Front Suspension Options: IFS vs. Solid Axle

Choosing between Independent Front Suspension (IFS) and a solid axle significantly impacts your F100’s handling and ride quality. Solid axles, traditional for these trucks, offer simplicity, durability, and straightforward installation, often favored for off-road builds or retaining a classic feel. However, they generally provide a less refined ride on paved roads.

IFS, conversely, delivers superior handling, a smoother ride, and improved steering response. It’s ideal for street-focused builds prioritizing comfort and performance. Installation is more complex, often requiring chassis modifications or a complete aftermarket chassis. Considerations include cost, intended use, and desired level of performance; Modern IFS kits offer various geometry options to fine-tune handling characteristics, making them a versatile choice for diverse F100 projects.

Rear Suspension Options: Leaf Springs vs. Four-Link

Selecting the right rear suspension for your F100 – leaf springs or a four-link – is crucial for achieving your desired ride and handling characteristics. Leaf springs are the factory setup, offering simplicity, affordability, and a classic look. They’re well-suited for maintaining a traditional aesthetic and are relatively easy to upgrade with heavier-duty springs or lowering blocks.

A four-link suspension, however, provides superior handling, adjustability, and ride quality. It utilizes four control arms to locate the rear axle, allowing for precise tuning of roll center and anti-squat geometry. While more complex and expensive to install, a four-link unlocks significant performance potential, especially for lowered or high-horsepower F100s. Consider your budget, intended use, and desired level of customization when making your decision.

Choosing the Right Shocks and Springs

Selecting appropriate shocks and springs is vital for optimizing your F100’s ride quality and handling. Spring rate must match your vehicle’s weight and intended use – heavier springs for towing or hauling, softer springs for a comfortable ride. Consider whether you’re retaining the original suspension geometry or upgrading to a more modern setup.

Shocks control body motion and dampen oscillations. Options range from basic hydraulic shocks to adjustable coil-overs, allowing fine-tuning of damping characteristics. Match shock valving to your spring rate and driving style. For lowered trucks, shorter shocks are necessary. Research reputable brands and consider consulting with suspension specialists to ensure compatibility and optimal performance for your specific F100 build.

Steering System Upgrades

Upgrading your F100’s steering is crucial for improved handling and driver confidence, especially with modifications like engine swaps or suspension changes. Original steering systems can feel vague and lack precision. Power steering is a popular upgrade, offering easier maneuverability, particularly with larger tires.

Consider a modern steering box or rack-and-pinion conversion for enhanced responsiveness. Ensure compatibility with your chassis and suspension setup. Upgrading to a quicker steering ratio reduces steering effort and improves turn-in. Don’t forget to address steering linkage and tie rod ends, opting for stronger, more durable components. Proper alignment is essential after any steering system modification for optimal performance and tire wear.

Engine & Drivetrain

Engine swaps are common, with options ranging from classic small-blocks to modern LS engines; transmission choices include manual or automatic, impacting drivability.

Popular Engine Swaps for F100s

The Ford F100 platform offers incredible flexibility when it comes to engine swaps, allowing builders to dramatically increase power and modernize performance. A consistently popular choice is the Ford Coyote 5.0L engine, known for its robust power output and relatively compact size, fitting well within the F100’s engine bay.

The LS engine family from General Motors is another frequently selected option, prized for its aftermarket support and affordability. These engines provide substantial horsepower gains and are readily available. For those seeking a classic feel with modern reliability, a Ford 302 or 351 Windsor small-block remains a viable and cost-effective solution.

Beyond these, builders are also exploring modern EcoBoost engines for a blend of efficiency and power. Careful consideration of mounting points, wiring, and cooling systems is crucial for any successful engine swap.

Transmission Options: Manual vs. Automatic

Choosing between a manual and automatic transmission for your F100 build significantly impacts the driving experience. Modern six-speed manual transmissions, like the T56 Magnum, offer precise shifting and enhanced control, appealing to enthusiasts who prefer a more engaging drive. However, they require modifications to the floor pan and pedal assembly.

Automatic transmissions provide convenience and ease of use, particularly in traffic. Popular choices include the 4R70W and the AOD, both offering overdrive for improved highway cruising. Modern electronically controlled automatics, like the 6L80E, deliver smooth shifts and enhanced performance but necessitate a more complex wiring setup.

Consider your driving style and intended use when making this crucial decision.

Rear End Options and Gear Ratios

Selecting the correct rear end and gear ratio is vital for optimizing your F100’s performance. Ford 9-inch rear ends are popular due to their durability and readily available aftermarket support, offering various gear ratios for different applications. For street builds, ratios between 3.50:1 and 3.70:1 provide a good balance of acceleration and highway cruising.

If you plan on towing or off-roading, lower ratios like 4.10:1 or 4.56:1 will provide increased torque, but may sacrifice fuel economy at higher speeds. Modern LS-based rear ends offer superior strength and gearing options.

Carefully consider your engine’s power band and intended use when choosing your rear end setup.

Fuel System Upgrades

Modernizing the fuel system is crucial when swapping to a more powerful engine in your F100. Upgrading to an electric fuel pump delivers consistent fuel pressure, essential for modern fuel injection systems. Consider an in-tank pump for quieter operation and improved fuel cooling.

Larger fuel lines and a high-flow fuel filter are also recommended to support increased fuel demands. For carbureted engines, an adjustable fuel pressure regulator ensures optimal performance.

Always prioritize safety; use fuel-rated hoses and fittings, and ensure proper grounding to prevent fuel leaks and potential fires.

Bodywork & Restoration

Restoring an F100 involves sheet metal repair, rust mitigation, and potential cab/bed modifications, culminating in professional paint and body finishing for a lasting look.

Sheet Metal Repair and Replacement

F100 sheet metal restoration often begins with assessing damage – rust, dents, or previous repairs. Minor imperfections can be hammered out, but extensive corrosion usually necessitates panel replacement. Sourcing correct replacement panels is crucial; LMC Truck is a valuable resource for F100-specific parts.

When welding new panels, proper preparation is key: clean metal, accurate fitment, and appropriate welding techniques prevent warping and ensure structural integrity. Consider using a shrinker/stretcher tool to fine-tune panel shapes. Patch panels are viable for smaller areas, but full panel replacement offers a more robust, long-term solution. Remember to address underlying rust prevention with coatings before final assembly.

Rust Repair Techniques

F100 rust repair demands thoroughness. Begin by removing all affected metal, extending beyond visible corrosion to ensure complete eradication. Media blasting is excellent for revealing the full extent of the damage. Several repair methods exist, ranging from patch panels welded into place to full panel replacement, depending on severity.

Effective rust prevention is paramount. After welding, apply rust converters to neutralize remaining corrosion, followed by a quality epoxy primer. Seam sealer is vital in vulnerable areas like floor pans and cab corners. Finally, apply multiple coats of high-quality paint and a protective clear coat. Consistent maintenance and undercoating will safeguard against future rust formation.

Cab and Bed Modifications

F100 cab modifications range from subtle interior updates to extensive structural changes. Shortening the cab, sectioning the roof, or fabricating custom door panels are common customizations. Bed modifications often involve shortening the bed for a sleeker look, or creating a custom bed floor. Careful planning and precise metal fabrication are crucial for successful modifications.

When altering the cab or bed, prioritize structural integrity. Reinforce weakened areas with additional bracing and welding. Ensure all modifications comply with safety regulations. Consider the impact on the vehicle’s weight distribution and handling. Professional assistance is recommended for complex modifications, guaranteeing a safe and aesthetically pleasing result.

Paint and Body Finishing

F100 paint and body finishing demands meticulous preparation for a lasting, show-quality result. Begin with thorough rust repair and sheet metal smoothing, ensuring all surfaces are perfectly aligned. Apply multiple coats of primer, sanding between each layer to achieve a flawless base. Choose a high-quality paint system suited to your desired aesthetic – classic single-stage or modern two-stage options are available.

Consider professional painting for optimal results, especially with complex colors or finishes. Clear coat application protects the paint and adds depth. Attention to detail during wet sanding and polishing is vital for a mirror-like shine. Don’t overlook undercarriage painting for corrosion protection and a finished look.

Interior & Electrical

Interior restoration and customization, alongside wiring harness upgrades, gauge installations, and sound deadening, elevate the F100 driving experience significantly.

Interior Restoration and Customization

Reviving the F100’s interior involves choices ranging from faithful restoration to modern customization. Original bench seats can be re-upholstered, preserving the classic aesthetic, or swapped for more supportive bucket seats. Consider materials like durable vinyl or luxurious leather.

Dashboard restoration is crucial; cracked or faded surfaces can be repaired or replaced. Modern gauge clusters offer improved functionality and a cleaner look. Upgrading the steering wheel enhances comfort and control. Don’t overlook details like door panels, headliners, and carpeting – these contribute significantly to the overall feel.

For customization, explore options like custom consoles, integrated audio systems, and ambient lighting. Thoughtful interior design blends vintage charm with modern convenience, creating a truly personalized F100.

Wiring Harness Upgrades

Original F100 wiring can become brittle and unreliable over time, posing safety risks and hindering modern upgrades. Replacing the entire wiring harness with a modern equivalent is highly recommended for any substantial build. These harnesses offer improved insulation, increased capacity for accessories, and simplified installation.

Consider a harness designed specifically for your F100’s year and intended modifications, such as engine swaps or added lighting. Modern harnesses often include provisions for power windows, locks, and updated sound systems.

Proper grounding is essential for a stable electrical system. Ensure all connections are clean and secure. A well-executed wiring upgrade enhances reliability, safety, and the overall enjoyment of your restored or modified F100.

Gauge and Instrument Panel Options

Upgrading the F100’s gauges and instrument panel dramatically improves the driving experience and adds a custom touch; Original factory gauges can be unreliable or lack the information desired for modern engine swaps. Numerous aftermarket options are available, ranging from classic-looking reproductions to fully digital displays.

Consider AutoMeter, Classic Instruments, or Dakota Digital for comprehensive gauge sets. These often include speedometer, tachometer, fuel level, temperature, oil pressure, and voltmeter readings.

Custom instrument panels can be fabricated or purchased pre-made to seamlessly integrate the new gauges. Ensure compatibility with your chosen engine and transmission for accurate readings. A modern gauge setup enhances both functionality and aesthetics.

Sound Deadening and Insulation

Improving the cabin comfort of an F100 often involves addressing noise and temperature control through sound deadening and insulation. Older trucks lack the modern soundproofing found in newer vehicles, resulting in a noisy ride. Applying sound deadening material to the floor, doors, roof, and firewall significantly reduces road noise and vibrations.

Dynamat, Hushmat, and Kilmat are popular brands offering effective sound deadening solutions. Adding insulation, such as fiberglass or closed-cell foam, helps regulate cabin temperature, keeping it cooler in summer and warmer in winter.

Proper insulation also reduces heat transfer from the engine and exhaust. These upgrades enhance the overall driving experience, making long trips more enjoyable.

Braking Systems

Upgrading your F100’s brakes is crucial for safety; disc brake conversions, master cylinder upgrades, and proper brake line installation are essential improvements.

Disc Brake Conversions

Converting to disc brakes significantly enhances your F100’s stopping power and overall safety. Drum brakes, common in older models, simply don’t offer the same performance as modern disc systems. Several kits are available, offering varying levels of complexity and cost. These kits typically include everything needed – rotors, calipers, pads, hoses, and sometimes even a new master cylinder.

When selecting a kit, consider your intended use for the truck. For a daily driver or mild restoration, a basic bolt-on kit may suffice. However, for performance-oriented builds or heavier trucks, a more robust kit with larger rotors and multi-piston calipers is recommended. Proper installation is paramount; ensure all components are correctly fitted and bled to avoid issues. Don’t forget to account for wheel size compatibility when choosing a disc brake conversion kit.

Master Cylinder and Booster Upgrades

Upgrading the master cylinder and brake booster is crucial when converting to disc brakes, or even when simply improving the performance of existing drum brakes on your F100. The original components may not be adequately sized to handle the increased hydraulic demand of disc brakes, leading to a spongy pedal feel and reduced stopping power.

Dual-diaphragm boosters offer improved performance and reliability compared to single-diaphragm units. When selecting a master cylinder, consider the number of outlets (typically single or dual) and the bore size. A larger bore generally provides more pedal feel and stopping power, but can also require more effort. Ensure compatibility with your chosen brake system and consider power brake options for easier operation. Proper bench bleeding is essential before installation.

Brake Line Routing and Installation

Proper brake line routing is paramount for safety and performance in your F100 build. Avoid sharp bends and ensure lines are securely fastened away from exhaust components and moving parts to prevent damage and heat transfer. Utilize quality, DOT-approved brake lines – stainless steel braided lines offer superior durability and reduced expansion under pressure.

When installing, carefully flare the ends of the lines to create leak-free connections. Double-flare fittings are recommended for increased reliability. Thoroughly inspect all fittings for corrosion or damage before assembly. Bleeding the brake system after installation is critical to remove air and ensure optimal braking performance. Always prioritize safety and double-check all connections before driving.

speak out exercises pdf

Speak Out Exercises PDF: A Comprehensive Guide (Updated 12/10/2025)

Speak Out exercise PDFs, encompassing Student Books, Workbooks, and Teacher’s resources, are readily available online as of today, December 10th, 2025.

What is Speak Out?

Speak Out is a globally recognized English language course published by Pearson, designed to build both fluency and confidence. It’s a comprehensive system, offering materials for various levels – from Starter to Advanced.
Resources, including exercise PDFs for Student Books and Workbooks, are frequently sought after by learners and educators. The series emphasizes real-world communication skills, preparing students for practical English usage.

Speak Out 3rd Edition: Overview and Components

The Speak Out 3rd Edition provides a modern approach to English learning. Key components include the Student Book, offering core lessons, and the Workbook, for practice – often found as PDFs. Teachers benefit from a detailed Teacher’s Book and a Classroom Presentation Tool. Access to these materials, including exercise PDFs, enhances the learning experience.

Student Book

The Speak Out Student Book, available as a PDF, forms the core of the course. It presents new language through engaging topics and provides a foundation for exercises. These PDFs often include integrated audio access, supporting listening comprehension. Students utilize the book’s exercises to build fluency and confidence in English communication.

Workbook (with and without Key)

Speak Out Workbooks, offered as PDFs with or without answer keys, provide supplementary practice for each Student Book unit. These PDFs contain diverse exercises – grammar, vocabulary, and skills-based – reinforcing learning. The availability of a key allows for self-assessment, while the version without supports classroom testing and independent study.

Teacher’s Book

The Speak Out Teacher’s Book PDF is a crucial resource for educators. It provides detailed lesson plans, teaching tips, and answer keys for all exercises. These PDFs often include supplementary materials like worksheets and audio scripts, streamlining lesson preparation and delivery. Access to these resources enhances teaching effectiveness.

Classroom Presentation Tool (Online)

Speak Out’s Classroom Presentation Tool, available online, integrates seamlessly with the PDF exercises. It offers interactive activities, videos, and audio files, enriching the learning experience. Teachers can easily display exercises and engage students directly. This digital tool complements the PDF materials, fostering a dynamic classroom environment.

Accessing Speak Out PDFs Online

Official Pearson Website Resources

Pearson’s official website provides secure access to Speak Out PDFs, often requiring registration or purchase. These resources include downloadable components for students and teachers, ensuring authentic materials. The Classroom Presentation Tool is also available online. While direct PDF access varies, Pearson offers digital versions and supplementary materials.

Third-Party Websites Offering PDFs

Legality and Copyright Considerations

Downloading Speak Out PDFs from unofficial sources may infringe on Pearson’s copyright. Accessing copyrighted material without permission is illegal. Prioritize official Pearson resources or legitimate online learning platforms. Respecting intellectual property ensures continued quality content and supports the creators of Speak Out;

Speak Out Levels and Corresponding PDFs

Speak Out offers PDFs across all levels: Starter, Elementary, Pre-Intermediate, Intermediate, Upper-Intermediate, and Advanced. These include Student Books, Workbooks (with/without keys), and Teacher’s resources. Finding specific PDFs depends on the level; resources are available for download and digital access, supporting diverse learning needs.

Starter Level PDFs

Speak Out Starter level PDFs typically include the Student Book, providing foundational English lessons, and the accompanying Workbook for practice. While dedicated Teacher’s Book PDFs exist, access may vary. These resources focus on basic vocabulary and grammar, ideal for beginners, and are available through various online platforms.

Elementary Level PDFs

Speak Out Elementary PDFs build upon the Starter level, offering more complex grammar and vocabulary exercises. Students can find Student Book and Workbook PDFs for self-study, alongside Teacher’s resources for educators. These materials emphasize practical communication skills, preparing learners for everyday interactions, and are widely accessible online.

Pre-Intermediate Level PDFs

Speak Out Pre-Intermediate PDFs further develop fluency and accuracy, introducing more nuanced language structures. Learners can access Student Book, Workbook (with and without keys), and supplementary materials online. These PDFs focus on expanding conversational abilities and tackling real-world scenarios, preparing students for more advanced levels.

Intermediate Level PDFs

Speak Out Intermediate PDFs build upon foundational skills, emphasizing complex grammar and sophisticated vocabulary. Students benefit from comprehensive Workbooks, often including answer keys for self-assessment, alongside the Student Book. These resources enhance communicative competence, preparing learners for confident interactions in diverse contexts, and are easily downloadable.

Upper-Intermediate Level PDFs

Speak Out Upper-Intermediate PDFs challenge learners with nuanced language and authentic materials. These resources focus on refining fluency and accuracy, incorporating advanced grammar structures and idiomatic expressions. Workbooks provide extensive practice, while Teacher’s resources offer supplementary activities and assessments for comprehensive skill development.

Advanced Level PDFs

Speak Out Advanced PDFs are designed for near-native fluency, focusing on sophisticated topics and complex language. These materials emphasize critical thinking and nuanced communication skills. Expect challenging exercises in all four skills – reading, writing, listening, and speaking – alongside extensive vocabulary building and error correction practice.

Types of Exercises Found in Speak Out PDFs

Speak Out PDFs feature diverse exercises. Grammar drills reinforce structures, while vocabulary tasks expand lexicon. Listening comprehension activities use authentic audio, and speaking practice encourages fluency. Expect tasks like gap-fills, multiple choice, discussions, and role-plays, all designed to build communicative competence.

Grammar Exercises

Speak Out grammar exercises systematically cover key areas. Expect focused practice on tenses, modals, articles, and sentence structure. Activities include gap-fill tasks, sentence transformations, and error correction. PDFs often provide contextualized examples, aiding comprehension. These exercises build a solid grammatical foundation for accurate and confident communication.

Vocabulary Exercises

Speak Out vocabulary exercises enhance lexical resourcefulness. PDFs feature matching activities, word formation tasks, and contextualized usage practice. Learners encounter new words and phrases within relevant themes. Expect exercises focusing on synonyms, antonyms, and collocations. These activities aim to improve fluency and precision in expressing ideas effectively.

Listening Comprehension Exercises

Speak Out PDFs provide diverse listening comprehension exercises. These include multiple-choice questions, gap-fill activities, and true/false statements based on authentic audio recordings. Learners practice identifying main ideas, specific details, and speaker attitudes. Exercises cater to various accents and speaking speeds, building crucial aural skills for effective communication.

Speaking Practice Activities

Speak Out PDFs feature engaging speaking activities designed to boost fluency and confidence. These include role-plays, discussions, and presentations, often linked to real-world scenarios. Many exercises encourage learners to express opinions, debate viewpoints, and collaborate with peers, fostering communicative competence. The AI-powered tutor further enhances practice.

Using Speak Out PDFs for Self-Study

Speak Out PDFs are excellent for independent learning. Create a structured study schedule, dedicating time to each exercise type. Utilize the answer key, when provided, for self-assessment. Supplement your study with online audio resources to improve pronunciation and listening skills, leveraging the AI tutor for conversational practice.

Creating a Study Schedule

Effective self-study with Speak Out PDFs requires a well-defined schedule. Allocate specific times for grammar, vocabulary, listening, and speaking exercises. Break down larger units into smaller, manageable sections. Prioritize areas needing improvement and incorporate regular review sessions to reinforce learning and track progress consistently.

Utilizing the Answer Key (When Available)

When working with Speak Out PDFs, the answer key is invaluable for self-assessment. Carefully check your responses to identify areas of weakness. Don’t simply look up answers; attempt each exercise first. Use the key to understand why an answer is correct, fostering deeper comprehension and solidifying your language skills.

Supplementing with Online Audio Resources

Speak Out PDFs are significantly enhanced by accompanying audio files. Utilize these resources for listening comprehension exercises and pronunciation practice. Many online platforms host Speak Out audio, complementing the textbook material. Immerse yourself in authentic speech patterns to improve fluency and overall language proficiency, maximizing your learning experience.

Speak Out and Technology: AI Integration

Speak is revolutionizing language learning through AI. Its AI-powered tutor offers conversational practice, mimicking real-life interactions. Automatic Speech Recognition (ASR) provides instant feedback on pronunciation. This integration enhances Speak Out PDF exercises, creating a dynamic and personalized learning journey focused on achieving spoken fluency.

Speak’s AI-Powered Tutor

Speak’s AI tutor replicates natural conversations, addressing a key challenge in language acquisition. It complements Speak Out PDF exercises by providing personalized practice, unavailable through traditional methods. This innovative tool focuses on spoken fluency, offering a dynamic alternative to relying solely on textbooks and workbooks.

Automatic Speech Recognition (ASR) in Speak Out

Speak integrates Automatic Speech Recognition (ASR) to revolutionize language learning, enhancing the utility of Speak Out PDF materials. ASR provides instant feedback on pronunciation, supplementing workbook exercises and fostering accurate speech. This technology, central to Speak’s vision, elevates practice beyond static PDF content, promoting dynamic skill development.

The Future of Language Learning with Speak

Speak envisions a future where AI-powered tutors, like those integrated with Speak Out materials, personalize learning. PDF exercises become interactive, adapting to individual needs through ASR and intelligent feedback. This approach aims to overcome traditional learning barriers, focusing on achieving spoken fluency—a core tenet of Speak’s long-term development.

Speak Out Resources for Teachers

Teachers benefit from readily available Speak Out resources, including downloadable PDF photocopiables, comprehensive tests, and assessment materials. Online practice tests supplement the core PDF exercises. These tools, accessible as of December 10th, 2025, streamline lesson planning and provide valuable insights into student progress, enhancing the overall learning experience.

Photocopiables

Speak Out photocopiables, available as PDF downloads, offer teachers convenient supplementary exercises. These readily printable materials expand upon core Student Book content, providing extra practice in grammar, vocabulary, and skills. They are designed to reinforce learning and cater to diverse classroom needs, enhancing the Speak Out experience.

Tests and Assessments

Speak Out provides comprehensive PDF tests and assessments for teachers to accurately gauge student progress. These include unit tests, progress tests, and entry/exit tests, mirroring the Student Book content. Online practice tests are also available, offering automated scoring and valuable insights into student performance and areas needing improvement.

Online Practice Tests

Speak Out’s online practice tests, accessible via PDF-linked resources, offer students interactive assessment opportunities. These tests automatically score results, providing immediate feedback and identifying areas for focused study. Teachers can monitor class performance and tailor instruction accordingly, enhancing the learning experience and solidifying comprehension.

Troubleshooting PDF Issues

Speak Out PDFs sometimes present challenges. If a PDF fails to open, ensure you have the latest Adobe Acrobat Reader. Incorrect formatting can often be resolved by updating your browser or PDF viewer. Missing audio files may require re-downloading the resource or checking internet connectivity.

PDF Not Opening

Speak Out PDFs refusing to open are a common issue. First, verify you possess the newest version of Adobe Acrobat Reader. Try a different PDF reader if the problem persists. Ensure the file isn’t corrupted by re-downloading it from a trusted source. A system restart can also sometimes resolve this frustrating problem.

Incorrect Formatting

Speak Out PDFs sometimes display with incorrect formatting – fonts are off, or text is jumbled. This often stems from differing PDF reader versions or a corrupted file. Try updating your reader or downloading the PDF again. Ensure your display settings are optimal for PDF viewing for a clearer experience.

Missing Audio Files

Speak Out PDFs frequently require accompanying audio for listening exercises. If audio files are missing, check the source website – often, they’re separate downloads. Verify your internet connection during download. Some third-party sites may lack these files; the official Pearson website is the most reliable source for complete resources.

gregg shorthand pdf

Gregg Shorthand PDF: A Comprehensive Guide

Gregg Shorthand‚ documented in PDF format‚ offers a historical writing system with resources available through the Digital Library of India and Archive.org.

Numerous PDF versions‚ like the annotated manual‚ facilitate learning and quicker writing‚ spanning from 1893 editions to modern adaptations‚ totaling 196 pages.

Gregg Shorthand‚ readily accessible in PDF format‚ represents a phonetic shorthand system designed for rapid handwriting. Its core principle revolves around simplified‚ flowing strokes‚ diverging from traditional stenography’s complex symbols.

Initially published in 1893‚ as evidenced by digitized versions from sources like the Digital Library of India‚ Gregg Shorthand aimed to provide a more intuitive and efficient method for capturing speech. The system’s accessibility is greatly enhanced by the proliferation of PDF manuals and guides available online.

These PDF resources‚ often encompassing around 196 pages‚ serve as comprehensive learning tools‚ covering everything from basic stroke formation to advanced phraseography. The availability of these digital copies allows learners to study at their own pace‚ utilizing tools for annotation and practice. The enduring legacy of Gregg Shorthand is sustained by these readily available PDF documents.

Historical Context of Gregg Shorthand

Gregg Shorthand emerged in the late 19th century‚ with its foundational work appearing in 1893‚ as documented in preserved PDF copies; John Robert Gregg developed the system as a reaction against the prevalent‚ complex shorthand methods of the time‚ aiming for greater simplicity and learnability.

The initial PDF publications‚ and subsequent revisions‚ quickly gained traction‚ becoming a popular choice for journalists‚ secretaries‚ and anyone needing to rapidly record spoken language. The system’s widespread adoption is reflected in the numerous digitized versions now available online‚ including those from the Digital Library of India.

Throughout the 20th century‚ Gregg Shorthand underwent several adaptations and modernizations‚ with updated PDF manuals reflecting these changes. Despite the rise of digital recording technologies‚ the system retains a dedicated following‚ with enthusiasts continuing to study and practice using these historical PDF resources.

John Robert Gregg: The Creator

John Robert Gregg‚ the originator of Gregg Shorthand‚ sought to revolutionize speedwriting with a system based on phonetic principles and simplified forms. His initial publications‚ now frequently found as digitized PDF documents‚ stemmed from a desire to create a more accessible and logical shorthand method.

Gregg’s approach differed significantly from earlier systems‚ emphasizing flowing‚ connected strokes rather than complex‚ arbitrary symbols. The enduring availability of PDF versions of his manuals—like the annotated “A Manual for Shorthand”—testifies to the lasting impact of his design.

His work‚ initially published by The Gregg Publishing Company‚ quickly gained prominence. Today‚ accessing these original PDF resources allows learners to directly engage with Gregg’s foundational concepts and understand the rationale behind his innovative shorthand system‚ ensuring his legacy continues.

The Principles of Gregg Shorthand

Gregg Shorthand operates on core principles of phonography‚ representing sounds rather than traditional spelling. Found extensively in available PDF resources‚ the system utilizes a limited set of basic strokes – circles‚ hooks‚ and straight lines – combined to form outlines representing words and phrases.

These strokes are joined fluidly‚ creating a visually distinct and efficient writing style. PDF manuals emphasize the importance of consistent stroke formation and accurate phonetic transcription. Vowel indication is subtle‚ often implied by the position of consonants within an outline‚ a key aspect detailed in instructional PDFs.

The system’s efficiency stems from its brevity and reliance on common letter combinations and contractions‚ all thoroughly explained within digitized PDF guides. Mastering these principles‚ as presented in these resources‚ unlocks the speed and fluency inherent in Gregg Shorthand.

Why Use Gregg Shorthand?

Despite the digital age‚ learning Gregg Shorthand‚ accessible through numerous PDF resources‚ offers unique benefits. Historically‚ it provided a rapid note-taking method for journalists‚ court reporters‚ and professionals needing efficient transcription – skills still valuable today.

Studying Gregg Shorthand enhances focus‚ improves phonetic awareness‚ and develops a deeper understanding of language structure. The availability of free and paid PDF manuals makes learning accessible to anyone with an interest. While not as prevalent as in the past‚ it remains a fascinating intellectual pursuit.

Furthermore‚ deciphering historical documents written in Gregg Shorthand – often found as digitized PDFs – opens access to a wealth of primary source material. It’s a skill that connects learners to a rich history of communication and efficiency.

Understanding the Gregg Shorthand System

Gregg Shorthand‚ found in detailed PDF guides‚ relies on a phonetic alphabet of basic strokes‚ vowel indications‚ and joined outlines for rapid writing.

The Gregg Alphabet: Basic Strokes

Gregg Shorthand’s foundation lies in a limited set of fundamental strokes‚ meticulously detailed within available PDF resources. These aren’t complex curves‚ but rather simple‚ consistently formed lines – the building blocks of the entire system. The core strokes include the forward slant‚ the backward slant‚ the horizontal‚ the vertical‚ and the small circle.

Mastering these basic strokes‚ as illustrated in PDF manuals‚ is paramount. Consistent shape and angle are crucial for legibility and speed. Variations in thickness and length differentiate sounds. The system’s efficiency stems from combining these strokes to create outlines representing whole syllables or words.

PDF guides emphasize practicing these strokes repeatedly until they become automatic. Drills focus on smooth transitions between strokes‚ building muscle memory. Understanding the directionality and consistent formation of each stroke is key to unlocking the entire Gregg Shorthand method‚ as presented in the digitized texts.

Vowel Representation in Gregg Shorthand

Gregg Shorthand uniquely handles vowel sounds‚ differing significantly from traditional writing systems. Unlike explicitly writing each vowel‚ PDF resources reveal vowels are often indicated by the position of subsequent consonants within an outline. This makes the system remarkably concise.

Vowel sounds aren’t always directly represented; their presence is inferred from the context of the surrounding consonant strokes. Certain strokes‚ when placed appropriately‚ can suggest specific vowel sounds. PDF manuals detail these positional indicators and their associated vowel values.

However‚ explicit vowel markings are used in certain situations‚ particularly for clarity or when a vowel sound is crucial for meaning. These are typically small‚ brief strokes added to the outline. Studying PDF examples is vital to understanding these nuanced vowel representations and achieving accurate transcription.

Consonant Representation in Gregg Shorthand

Gregg Shorthand’s consonant representation centers around a core set of basic strokes‚ as detailed in available PDF guides. These strokes – circles‚ hooks‚ straight lines‚ and combinations thereof – form the building blocks of the system. Each consonant is generally represented by one or more of these fundamental shapes.

PDF resources emphasize that the direction and curvature of these strokes are crucial; Slight variations in angle or length can differentiate between different consonants. Mastering these subtle distinctions is key to accurate reading and writing. The system prioritizes fluidity‚ encouraging connected strokes rather than isolated characters.

Furthermore‚ consonant sounds are often modified by their position within an outline‚ influencing their precise form. Learning these positional variations‚ thoroughly explained in PDF manuals‚ is essential for achieving speed and accuracy in shorthand transcription.

Joining Strokes and Creating Outlines

Gregg Shorthand’s efficiency stems from seamlessly joining strokes to form complete word outlines‚ a concept thoroughly illustrated in PDF learning materials. Unlike traditional writing‚ lifting the pen is minimized‚ promoting speed and flow. These outlines aren’t simply linear arrangements; they leverage spatial relationships and stroke connections.

PDF guides demonstrate how consonants and vowels are blended within these outlines‚ creating compact representations of words. The direction of joining is significant‚ often indicating grammatical function or phonetic nuances. Mastering these joining rules is crucial for accurate transcription.

Practice PDF exercises emphasize recognizing common outline patterns and building new ones. Understanding how strokes interact and blend is paramount. Successful outline creation requires consistent practice and a keen eye for detail‚ as detailed in available resources.

Punctuation in Gregg Shorthand

Gregg Shorthand employs a unique system of punctuation‚ efficiently integrated within the outlines themselves‚ as detailed in comprehensive PDF manuals. Unlike conventional writing‚ punctuation marks aren’t typically placed around words‚ but rather within or as modifications to the outlines.

PDF resources illustrate how small ticks‚ dots‚ and dashes‚ added to strokes‚ represent commas‚ periods‚ question marks‚ and other essential marks. The position and direction of these additions are critical for accurate interpretation. Mastering these subtle distinctions is key to fluent reading and transcription.

Learning materials emphasize recognizing punctuation indicators within outlines during practice. Consistent application‚ guided by PDF examples‚ ensures clarity and avoids ambiguity. Efficient punctuation is vital for capturing the full meaning of dictated text‚ making it a core skill.

Accessing Gregg Shorthand PDFs

Gregg Shorthand PDFs are readily available via the Digital Library of India‚ Archive.org‚ and potentially through paid options‚ offering historical and modern resources.

Where to Find Free Gregg Shorthand PDFs

Numerous online repositories offer Gregg Shorthand PDFs at no cost‚ making this valuable skill accessible to a wider audience. The Digital Library of India stands out as a prominent source‚ hosting digitized versions of classic texts‚ including the original 1893 publication‚ readily available for download.

Archive.org‚ also known as the Internet Archive‚ provides another excellent avenue for locating free Gregg Shorthand materials; A quick search reveals scanned copies of manuals and related resources‚ contributing to the preservation and dissemination of this shorthand system. These platforms often contain various editions and annotations‚ catering to different learning preferences.

Researchers and learners can benefit from the wealth of information available‚ allowing them to study the evolution of Gregg Shorthand and practice their skills without financial barriers. However‚ it’s crucial to verify the source and quality of the PDF before relying on its content for accurate learning.

Digital Library of India Resources

The Digital Library of India (DLI) provides a significant collection of digitized Gregg Shorthand PDFs‚ offering researchers and learners access to historical texts. Specifically‚ a 196-page Gregg Shorthand manual‚ originally published by The Gregg Publishing Company of New York‚ is available through the DLI.

Accessioned on July 22‚ 2015‚ and scanned at IIIT‚ Allahabad (scanner number 20003488)‚ this resource is categorized under ‘Literature’ and is available in PDF and TIFF formats. The DLI’s catalog entry includes metadata such as the barcode (05990010883343) and a unique URI (http://www.new.dli.ernet.in/handle/2015/261099) for direct access.

The DLI’s commitment to digitizing and preserving cultural heritage makes it an invaluable resource for anyone interested in studying Gregg Shorthand. Its platform ensures long-term accessibility to this important historical writing system‚ fostering continued learning and research.

Archive.org Availability

Archive.org‚ a vast digital library‚ also hosts several Gregg Shorthand PDF resources‚ complementing the offerings of the Digital Library of India. A notable entry‚ added on January 24‚ 2017‚ features a Gregg Shorthand document categorized as both a TIFF and PDF file.

This resource‚ identified with the identifier “in.e‚” provides another avenue for accessing digitized versions of classic Gregg Shorthand materials. While specific details regarding the edition or page count aren’t immediately prominent in the provided snippet‚ Archive.org’s platform allows users to explore related materials and potentially discover further resources.

Archive.org’s open access model and extensive collection make it a valuable supplementary source for those seeking to learn or research Gregg Shorthand‚ offering a diverse range of digitized texts and historical documents readily available to the public.

Paid Gregg Shorthand PDF Options

While numerous free Gregg Shorthand PDF resources exist‚ commercially available options often provide enhanced features or more comprehensive materials. These paid resources may include updated editions‚ detailed annotations‚ accompanying audio or video lessons‚ and interactive exercises designed to accelerate the learning process.

The “Gregg Shorthand ⎯ A Manual for Shorthand (Annotated): A Shorthand Steno Book” exemplifies a paid option‚ promising a comprehensive user manual covering installation‚ operation‚ and maintenance for mastering the system. These premium PDFs frequently cater to serious students seeking structured learning paths and professional-level proficiency.

Purchasing a PDF can ensure access to high-quality scans‚ accurate transcriptions‚ and potentially‚ supplementary materials not found in free versions‚ offering a more refined and focused learning experience for dedicated learners of Gregg Shorthand.

Evaluating the Quality of PDF Sources

When sourcing Gregg Shorthand PDF materials‚ critically evaluating the quality is paramount. Free sources‚ while abundant‚ can vary significantly in accuracy and legibility. Scans from the Digital Library of India or Archive.org‚ while valuable‚ may contain imperfections or incomplete pages‚ indicated by a total page count of 196 in some instances.

Assess the scan clarity; blurry or distorted images hinder learning. Verify the transcription accuracy‚ comparing it with known Gregg Shorthand principles. Consider the source’s reputation – established libraries like Bharti Bhawan Library Allahabad generally offer more reliable materials.

Beware of PDFs with missing information or inconsistent formatting. Prioritize sources with clear metadata‚ including publication dates (like the 1893 edition) and contributor details (John Robert Gregg). A thorough evaluation ensures a productive learning experience with reliable Gregg Shorthand resources.

Learning Gregg Shorthand with PDFs

Gregg Shorthand PDFs enable self-paced study‚ requiring essential tools and effective practice to decode outlines and overcome challenges for successful transcription.

Essential Tools for Studying

Successfully navigating Gregg Shorthand PDFs demands more than just the digital document itself. A dedicated notebook is crucial for consistent practice‚ allowing you to replicate strokes and build outlines repeatedly. High-quality pens‚ preferably with a fine point‚ are essential for precise stroke formation‚ mirroring the clarity of the original system.

Furthermore‚ access to a reliable PDF reader with annotation capabilities is highly recommended. This allows for direct marking of difficult passages‚ highlighting key principles‚ and adding personal notes for future reference. Consider utilizing online resources and companion websites that offer interactive exercises and stroke guides to supplement your learning.

A user manual‚ like those accompanying the Gregg Shorthand manual‚ provides installation‚ operation‚ and maintenance guidance. Finally‚ patience and consistent dedication are the most vital tools of all‚ as mastering this system requires diligent effort and a commitment to regular practice.

Effective Practice Techniques

Maximizing learning from Gregg Shorthand PDFs requires structured practice. Begin by isolating basic strokes‚ repeatedly writing them until muscle memory develops. Gradually progress to joining strokes‚ forming simple outlines‚ and then tackling more complex phrases. Dictation exercises‚ starting slowly and increasing speed‚ are invaluable for translating spoken words into shorthand.

Utilize the PDF’s search function to locate specific strokes or phrases for targeted practice. Regularly review previously learned material to reinforce retention. Transcribing passages from the PDF itself‚ then comparing your work to the original text‚ provides immediate feedback.

Consistency is key; dedicate short‚ focused practice sessions daily rather than infrequent‚ lengthy ones. Don’t be afraid to revisit earlier lessons when encountering difficulties. Embrace the challenge and celebrate small victories – mastering Gregg Shorthand is a rewarding journey;

Decoding Gregg Shorthand: A Step-by-Step Approach

Successfully decoding Gregg Shorthand from a PDF requires a systematic approach. First‚ familiarize yourself with the basic strokes and vowel representations within the system. Begin by identifying individual outlines‚ breaking down complex forms into their constituent parts.

Next‚ focus on recognizing common brief forms and contractions‚ as these significantly speed up writing and appear frequently. Utilize the PDF’s resources to cross-reference unfamiliar outlines. Practice reading transcribed passages‚ initially slowly‚ then gradually increasing your speed.

Context is crucial; consider the surrounding words to infer the meaning of ambiguous outlines. Don’t hesitate to consult a Gregg Shorthand dictionary or online resources when encountering challenges. Consistent practice and patience are essential for developing fluency.

Common Challenges and Solutions

Learning Gregg Shorthand from a PDF presents several common hurdles. Initial difficulty in distinguishing similar outlines is frequent; consistent practice with stroke differentiation is key. Recognizing vowel sounds‚ often implied rather than explicitly written‚ requires ear training and contextual understanding.

Brief forms and contractions can be initially confusing; dedicated memorization and frequent review are vital. Decoding speed can be slow at first; regular transcription exercises‚ starting with simple passages‚ will build fluency.

Poor PDF quality or illegible handwriting in scanned documents can pose challenges; seeking alternative sources or utilizing image enhancement tools may help. Remember‚ patience and persistence are crucial for overcoming these obstacles and mastering the system.

Resources for Further Learning

Beyond Gregg Shorthand PDF manuals‚ several avenues support continued learning. The Digital Library of India (new.dli.ernet.in) and Archive.org offer digitized historical texts‚ providing diverse practice material. Online communities and forums dedicated to shorthand can offer peer support and guidance.

Exploring phraseography – the writing of common phrases – accelerates speed and efficiency. Consider supplemental materials focusing on reporting and transcription techniques for practical application. Brendan Gregg’s work‚ though unrelated to shorthand directly‚ exemplifies analytical skill applicable to decoding complex systems.

Investigating adaptations and modernizations of Gregg Shorthand reveals its evolution. Utilizing digital tools alongside traditional methods can enhance the learning experience and bridge the gap to contemporary workflows.

Advanced Gregg Shorthand Concepts

PDF resources unlock phraseography‚ brief forms‚ and reporting skills within Gregg Shorthand‚ alongside adaptations and integration with modern digital transcription tools.

Phraseography in Gregg Shorthand

Phraseography represents a cornerstone of advanced Gregg Shorthand proficiency‚ significantly boosting writing speed and efficiency. Instead of outlining each word individually‚ phraseography utilizes specific‚ abbreviated forms for frequently occurring word combinations and phrases.

These pre-defined outlines‚ readily available in comprehensive Gregg Shorthand PDF manuals and learning resources‚ allow skilled stenographers to capture entire thoughts with fewer strokes. Mastering phraseography demands dedicated study and practice‚ as recognizing and accurately rendering these condensed forms is crucial.

PDF guides often categorize phrases thematically – legal‚ medical‚ commercial – aiding focused learning. Successful implementation relies on consistent review and application‚ transforming individual outlines into fluid‚ rapid writing. The Digital Library of India and Archive.org provide access to historical texts detailing these techniques‚ while modern PDF resources offer updated phrase lists and practice exercises.

Brief Forms and Contractions

Brief forms and contractions are fundamental to achieving speed in Gregg Shorthand‚ and are extensively detailed within available PDF resources. These represent simplified outlines for high-frequency words‚ drastically reducing stroke count and writing time. Unlike phraseography‚ which combines multiple words‚ brief forms abbreviate individual words.

PDF manuals categorize brief forms alphabetically or by phonetic sound‚ facilitating memorization. Common examples include contractions for “the‚” “of‚” “and‚” and “to.” Mastering these requires consistent practice and recognition drills‚ often found within practice exercises in PDF study guides.

The effectiveness of brief forms lies in their automatic application; a stenographer shouldn’t consciously think about the contraction‚ but rather write it instinctively. Resources like those from the Digital Library of India and Archive.org showcase historical usage‚ while newer PDFs may offer modernized lists and learning aids.

Reporting and Transcription

Reporting and transcription represent the practical application of Gregg Shorthand‚ and PDF resources often include exercises geared towards these skills. Historically‚ stenographers used Gregg to create verbatim records of speeches‚ court proceedings‚ and interviews‚ later transcribing these outlines into standard English.

PDF manuals dedicated to reporting emphasize accuracy‚ speed‚ and the ability to maintain clarity even during rapid dictation. Transcription practice‚ utilizing PDF-based drills‚ focuses on accurately converting shorthand outlines back into readable text. This requires a strong grasp of brief forms‚ phraseography‚ and vowel indicators.

Digital PDFs can aid this process by allowing for side-by-side comparison of shorthand and transcribed text. While modern digital recording has reduced the demand for traditional stenography‚ the skills remain valuable for specific legal and administrative roles. Resources from sites like Archive.org provide examples of historical reporting practices.

Adaptations and Modernizations

Gregg Shorthand‚ while rooted in a historical system‚ has seen several adaptations and modernizations over time‚ often reflected in available PDF resources. Early 20th-century versions‚ accessible as PDFs‚ demonstrate evolving principles aimed at increased speed and efficiency.

These changes included refinements to the alphabet‚ the introduction of new brief forms‚ and adjustments to phraseography. Some modern enthusiasts have even proposed digital adaptations‚ attempting to integrate Gregg principles with computer-aided transcription tools. However‚ widespread digital integration remains limited.

PDFs showcasing different editions highlight these evolutionary steps. While the core principles remain consistent‚ variations exist in stroke forms and abbreviation conventions. Studying these adaptations‚ through comparative PDF analysis‚ provides insight into the system’s flexibility and enduring relevance‚ even in a digital age.

Gregg Shorthand and Digital Tools

The intersection of Gregg Shorthand and digital tools remains a developing area‚ despite the system’s origins predating widespread computer use. While dedicated software is limited‚ PDF readers themselves are fundamental for accessing and studying digitized manuals and practice materials.

Some enthusiasts explore using Optical Character Recognition (OCR) software on PDFs to convert shorthand outlines into text‚ though accuracy varies significantly. Transcription can also be aided by online communities and forums where users share outlines and interpretations.

Furthermore‚ digital note-taking applications allow for practice and outline creation‚ mimicking the fluidity of traditional pen-and-paper methods. The availability of PDF resources is crucial for this integration‚ providing a foundation for modern learners to adapt this historical skill to contemporary workflows.

ablls assessment pdf free download

ABLLS Assessment PDF: A Comprehensive Guide (Updated November 28, 2025)

Navigating the ABLLS-R landscape often leads to searches for readily available resources, including a potential free PDF version. However, accessing legitimate,
current ABLLS-R materials requires careful consideration due to copyright and legal restrictions, as highlighted by the Tri-State Webinar series.

What is the ABLLS-R Assessment?

The Assessment of Basic Language and Learning Skills-Revised (ABLLS-R) is a comprehensive, criterion-referenced assessment tool widely utilized in the field of Applied Behavior Analysis (ABA). It’s designed to identify a learner’s present skill repertoire across various domains, providing a detailed picture of their abilities. Unlike standardized tests that compare a child to peers, the ABLLS-R focuses on pinpointing what a learner can already do.

This assessment isn’t simply a test; it’s a roadmap for skill acquisition. It breaks down skills into small, measurable units, starting from the very foundational levels and progressing to more complex abilities. The ABLLS-R protocol, as discussed in the Tri-State Webinar series, involves specific steps for administration and scoring, ensuring reliable and valid results.

CentralReach, a leading EMR provider for ABA, recognizes the importance of tools like the ABLLS-R in delivering effective therapy. While the desire for a “free PDF” version is understandable, obtaining the assessment legitimately is crucial for accurate implementation and ethical practice. The ABLLS-R is a dynamic assessment, meaning it adapts to the learner’s responses, providing a truly individualized profile.

The Purpose of the ABLLS-R

The primary purpose of the ABLLS-R is to create a highly individualized learning plan for individuals, often those with autism spectrum disorder or other developmental disabilities. It moves beyond simply identifying deficits; it establishes a clear starting point for teaching new skills, bridging the gap between current abilities and desired outcomes.

As highlighted in the Tri-State Webinar series, the assessment’s detailed protocol allows professionals to pinpoint specific skills a learner needs to acquire. This targeted approach maximizes learning efficiency and minimizes frustration. The ABLLS-R isn’t about labeling a child, but about understanding their unique learning profile.

CentralReach’s integration with assessments like the ABLLS-R underscores the importance of data-driven decision-making in ABA therapy. While the temptation to find a “free PDF” exists, legitimate access ensures the assessment is used correctly and ethically. Ultimately, the ABLLS-R aims to foster independence and improve the quality of life for learners by providing a structured pathway to skill mastery.

Key Areas Assessed by the ABLLS-R

The ABLLS-R comprehensively assesses a wide range of skills crucial for development, categorized into distinct domains. These areas include imitation, motor skills, receptive and expressive language, and social interactions. The assessment delves into a learner’s ability to follow instructions, understand concepts, and communicate effectively.

It also evaluates adaptive behavior skills, such as self-help routines and daily living skills. The Tri-State Webinar series emphasizes the importance of assessing these foundational skills to build a robust learning program. Understanding these key areas allows for the creation of targeted interventions.

While seeking a “free PDF” might seem appealing, it’s vital to remember that proper assessment requires trained professionals. CentralReach’s EMR integration highlights the need for accurate data collection across all assessed areas. The ABLLS-R provides a detailed roadmap for skill acquisition, ensuring a holistic and individualized approach to learning.

ABLLS-R Domains: A Detailed Breakdown

The ABLLS-R is structured around several key domains, each representing a critical area of skill development. These domains build upon each other, creating a progressive learning pathway. The first, Imitation & Motor Skills, assesses a learner’s ability to copy actions and demonstrate physical coordination. Receptive Language evaluates understanding of spoken words and instructions.

Expressive Communication focuses on the ability to convey thoughts and needs verbally or through alternative means. These domains, as discussed in the Tri-State Webinar, are interconnected and essential for overall progress. While the allure of a “free PDF” exists, understanding the nuances of each domain requires proper training.

CentralReach’s integration with the ABLLS-R emphasizes the importance of tracking progress within each domain. A thorough assessment across all areas provides a complete picture of a learner’s strengths and areas needing support, facilitating effective intervention planning.

Domain 1: Imitation & Motor Skills

Imitation & Motor Skills, the foundational first domain of the ABLLS-R, assesses a learner’s capacity to replicate both gross and fine motor actions, as well as vocalizations. This domain is crucial as it underpins many subsequent skills, including language development and social interaction. The assessment progresses from simple motor imitation – like copying basic movements – to more complex actions.

Successful imitation is a prerequisite for learning through observation and instruction. While seeking a “free PDF” of the ABLLS-R might seem appealing, understanding the specific protocols for evaluating these skills requires proper training, such as that offered through the Tri-State Webinar series.

CentralReach’s platform supports detailed tracking of progress within this domain, allowing therapists to monitor improvements in motor planning and execution. Accurate assessment here informs targeted interventions to build a strong foundation for future learning.

Domain 2: Receptive Language

Receptive Language, the second domain within the ABLLS-R, meticulously evaluates a learner’s ability to understand spoken language. This encompasses a wide range of skills, starting with responding to their name and progressing to comprehending complex instructions and concepts. The assessment systematically probes understanding of various linguistic elements, including nouns, verbs, adjectives, and prepositions.

A strong foundation in receptive language is vital for following directions, participating in conversations, and accessing academic content. While the allure of a “free PDF” ABLLS-R assessment may exist, accurately interpreting receptive language skills demands standardized procedures and professional expertise.

CentralReach’s EMR capabilities facilitate detailed documentation of receptive language milestones, enabling therapists to tailor interventions effectively. The Tri-State Webinar series provides valuable insights into administering and scoring this critical domain.

Domain 3: Expressive Communication

Expressive Communication, the third domain of the ABLLS-R, focuses on a learner’s capacity to effectively communicate their wants, needs, and ideas. This assessment explores various expressive modalities, beginning with vocalizations and gestures, and expanding to include single words, phrases, and complete sentences. It assesses the use of manding (requesting), tacting (labeling), and intraverbals (conversational skills).

Developing strong expressive communication skills is crucial for social interaction, independence, and overall quality of life. The temptation to seek a “free PDF” version of the ABLLS-R should be resisted, as accurate assessment requires trained professionals.

CentralReach’s platform supports detailed tracking of expressive communication progress, aiding in data-driven intervention planning. Resources like the Tri-State Webinar series offer guidance on effectively evaluating and fostering these vital skills.

Who Can Administer the ABLLS-R?

Administering the ABLLS-R requires specialized training and qualifications to ensure reliable and valid results. It is not intended for use by individuals without a thorough understanding of applied behavior analysis (ABA) principles and the assessment protocol itself. Qualified professionals typically include Board Certified Behavior Analysts (BCBAs), Board Certified Assistant Behavior Analysts (BCaBAs) under supervision, and other professionals working under the direct guidance of a BCBA.

The pursuit of a “free PDF” of the ABLLS-R often overlooks the critical component of proper training. Incorrect administration can lead to inaccurate data, hindering effective intervention planning. Resources like those offered through the Tri-State Webinar series emphasize the importance of certified professionals.

CentralReach supports qualified practitioners in utilizing the ABLLS-R effectively within their ABA practice, ensuring data integrity and client progress.

ABLLS-R Scoring and Interpretation

Accurate scoring and interpretation of the ABLLS-R are paramount for developing effective, individualized ABA programs. The assessment utilizes a detailed scoring system to pinpoint a learner’s current skill levels across various domains. This process demands rigorous training, as misinterpreting results can significantly impact intervention strategies.

Simply obtaining a “free PDF” of the assessment does not equip an individual with the necessary expertise to accurately score and interpret the data. The Tri-State Webinar series highlights the detailed steps involved in both administration and scoring, emphasizing the need for professional development.

CentralReach’s integration with the ABLLS-R aims to support qualified professionals in streamlining data collection and analysis, facilitating informed decision-making regarding client progress and program adjustments.

Using ABLLS-R Results for Program Development

The ABLLS-R isn’t merely a diagnostic tool; it’s a roadmap for crafting highly individualized ABA programs. Results pinpoint specific skill deficits, allowing therapists to prioritize learning targets and establish measurable goals. This data-driven approach ensures interventions are focused and efficient, maximizing learner progress.

However, relying on an illegally obtained “free PDF” version of the assessment undermines the integrity of this process. Without proper training – like that offered in the Tri-State Webinar series – interpreting the results and translating them into effective program components becomes problematic.

CentralReach’s platform supports this process by facilitating data-driven program planning and tracking, ensuring interventions align with the learner’s unique needs as identified by the ABLLS-R. Bridging the gap between clinic and classroom requires accurate assessment and targeted program development.

The Relationship Between ABLLS-R and ABA Therapy

The ABLLS-R is intrinsically linked to Applied Behavior Analysis (ABA) therapy, serving as a foundational assessment for developing individualized treatment plans. It identifies skill gaps across critical developmental areas, guiding ABA interventions to address those specific needs. This synergy ensures ABA therapy is targeted, effective, and demonstrably improves learner outcomes.

Seeking a “free PDF” of the ABLLS-R assessment compromises this vital connection. Without proper administration and interpretation – often gained through resources like the Tri-State Webinar series – the assessment’s value within an ABA framework diminishes significantly.

CentralReach’s EMR software exemplifies this relationship, integrating ABLLS-R data to streamline program development and track progress within ABA sessions. Accurate assessment, facilitated by legitimate resources, is paramount for ethical and effective ABA practice.

CentralReach and ABLLS-R Integration

CentralReach has emerged as a leading provider of Electronic Medical Record (EMR) software specifically designed for ABA practices, and boasts seamless integration with the ABLLS-R assessment. This integration streamlines workflows, allowing therapists to directly input ABLLS-R data into client profiles, facilitating data-driven decision-making and personalized treatment planning.

The platform’s capabilities extend beyond simple data entry, enabling progress monitoring, report generation, and collaborative care coordination. However, the effectiveness of this integration hinges on utilizing a legally obtained and current ABLLS-R assessment – not a potentially compromised “free PDF” version.

CentralReach’s commitment to ABA best practices underscores the importance of validated assessment tools. Utilizing unauthorized materials undermines the integrity of the data and ultimately hinders the delivery of high-quality ABA therapy.

Finding ABLLS-R Training Resources

Proper administration and interpretation of the ABLLS-R necessitate comprehensive training. While the allure of a “free PDF” might seem appealing, it cannot substitute for the in-depth knowledge gained through official training programs. Numerous resources are available to ensure practitioners are well-equipped to utilize this assessment effectively.

The Tri-State Webinar Series, for example, offers focused sessions on the ABLLS-R protocol, covering administration, scoring, and practical application. These webinars, and similar workshops offered by ABA-focused organizations, provide crucial hands-on experience and address nuanced aspects of the assessment.

Investing in legitimate training not only ensures competency but also safeguards against the risks associated with relying on potentially outdated or inaccurate information found in unofficial sources. Prioritize accredited training to uphold ethical standards and deliver optimal client outcomes.

Is a Free ABLLS-R PDF Available? (Legality & Risks)

The search for a “free ABLLS-R PDF” is common, but fraught with legal and ethical concerns. The ABLLS-R is a copyrighted assessment tool, and unauthorized distribution or reproduction is strictly prohibited. Downloading or using an illegally obtained PDF carries significant risks.

Firstly, it violates copyright law, potentially leading to legal repercussions. Secondly, unofficial PDFs may be outdated, incomplete, or contain errors, compromising the validity of assessments and potentially harming clients. Relying on inaccurate information can lead to misdiagnosis and ineffective intervention plans.

Furthermore, using an illegally obtained PDF undermines the integrity of the ABLLS-R and the professionals who administer it. Prioritizing ethical practice and obtaining the assessment through authorized channels is paramount. Exploring official purchase options and authorized resellers is the responsible course of action.

Legal Considerations Regarding ABLLS-R Distribution

The distribution of the ABLLS-R assessment is heavily governed by copyright law and licensing agreements. Unauthorized copying, sharing, or downloading of the ABLLS-R PDF constitutes a breach of these legal frameworks, potentially resulting in substantial penalties for individuals and organizations.

The creators and publishers of the ABLLS-R maintain strict control over its distribution to ensure the assessment’s validity and reliability. Only qualified professionals who have completed approved training are legally permitted to administer and interpret the ABLLS-R. Obtaining the assessment through unofficial channels circumvents this crucial qualification process.

Furthermore, distributing or possessing a pirated copy of the ABLLS-R PDF can expose users to malware and security threats. Protecting client data and maintaining professional integrity necessitate adherence to legal guidelines and the acquisition of the assessment from authorized sources.

Alternatives to Searching for a “Free PDF”

Instead of pursuing potentially illegal and risky downloads of a “free PDF” ABLLS-R, several legitimate avenues exist for accessing the assessment. Focusing on these options ensures compliance with copyright laws and guarantees access to a valid, up-to-date version of the tool.

Official ABLLS-R Purchase Options provide the most secure and reliable method. Directly purchasing from the publisher guarantees authenticity and access to any updates or revisions. Authorized Resellers and Distributors also offer a trustworthy alternative, ensuring the assessment’s integrity.

Consider exploring professional development opportunities like the Tri-State Webinar Series, which, while not providing a free PDF, offers comprehensive training on administering and scoring the ABLLS-R. Investing in proper training is crucial for effective and ethical assessment practices, ultimately benefiting the individuals being assessed.

Official ABLLS-R Purchase Options

Securing a legitimate copy of the ABLLS-R directly from the publisher remains the most reliable and legally sound approach, bypassing the risks associated with searching for a “free PDF” download. This ensures you receive the most current version, complete with all necessary materials and updates.

Purchasing directly guarantees access to the full assessment protocol, including the manual, scoring sheets, and any supplementary resources essential for accurate administration and interpretation. This eliminates the potential for incomplete or altered versions often found through unofficial channels.

The publisher’s website typically offers various purchase options, catering to different needs and budgets. These may include individual kits, bulk discounts for organizations, and digital access options. Investing in an official copy demonstrates a commitment to ethical assessment practices and provides the highest quality tool for supporting individuals’ development.

Authorized Resellers and Distributors

Beyond the publisher’s direct channels, a network of authorized resellers and distributors provides convenient access to the ABLLS-R, offering an alternative to seeking potentially illegal “free PDF” downloads. These partners are vetted to ensure they provide genuine assessment materials and uphold the integrity of the tool.

Authorized resellers often cater to specific regions or professional communities, streamlining the purchasing process and offering localized support. They can assist with order fulfillment, provide information on training opportunities, and address any questions regarding the assessment.

When considering a reseller, verifying their authorized status is crucial. The publisher typically maintains a list of approved distributors on their website, ensuring you’re purchasing from a reputable source. Choosing an authorized channel safeguards against counterfeit materials and supports the ongoing development and maintenance of the ABLLS-R.

The Tri-State Webinar Series on ABLLS-R

The Tri-State Webinar series offers invaluable professional development focused on the Assessment of Basic Language and Learning Skills-Revised (ABLLS-R), addressing crucial aspects of its administration and application. This two-part series delves into the protocol, beginning with a comprehensive overview of the ABLLS-R itself.

Part one specifically details the steps involved in administering and scoring this vital assessment tool, equipping professionals with the foundational knowledge needed for accurate implementation. This is particularly relevant when considering the risks associated with relying on unofficial sources, such as attempting to find a “free PDF” version online.

The webinar emphasizes proper training and understanding, highlighting that effective use of the ABLLS-R requires more than just access to the materials. It’s a critical step towards ethical and effective application, ensuring the best possible outcomes for individuals undergoing assessment.

ABLLS-R and Bridging the Gap Between Clinic and Classroom

The ABLLS-R’s utility extends beyond the clinical setting, playing a crucial role in fostering continuity between therapy and educational environments. CentralReach’s initiatives, like CR Assessments, aim to equip students with practical, real-world technology skills, directly supporting this bridge.

This integration is vital for ensuring consistent support and progress for learners, as skills acquired in the clinic can be reinforced and generalized within the classroom, and vice versa. However, the effectiveness of this collaboration hinges on utilizing properly obtained and understood assessment data.

The temptation to seek a “free PDF” of the ABLLS-R assessment compromises this integrated approach. Authentic implementation, informed by legitimate training and resources, is essential for accurate data collection and meaningful collaboration between therapists and educators, ultimately benefiting the student.

Future Trends in ABLLS-R Assessment

The evolution of the ABLLS-R assessment is likely to be shaped by advancements in technology and a growing emphasis on data-driven decision-making. Integration with platforms like CentralReach, streamlining EMR processes and data analysis, represents a significant current trend.

Looking ahead, we can anticipate increased sophistication in scoring and reporting capabilities, potentially leveraging artificial intelligence to identify patterns and predict learning trajectories. However, the core principles of reliable and valid assessment will remain paramount.

The persistent search for a “free PDF” version of the ABLLS-R highlights a need for greater accessibility to legitimate training and resources. Future developments may focus on innovative delivery methods and affordable options, ensuring practitioners have the tools they need without resorting to unauthorized downloads.

Resources for Further Learning About ABLLS-R

For comprehensive ABLLS-R training and understanding, several avenues are available beyond seeking a potentially illegal “free PDF” download. The Tri-State Webinar series offers in-depth exploration of the assessment protocol, covering administration, scoring, and practical application.

CentralReach provides valuable resources and integration tools for ABA professionals utilizing the ABLLS-R, enhancing data management and treatment planning. Official ABLLS-R purchase options, through authorized resellers, guarantee access to the most current and accurate materials.

Exploring professional organizations dedicated to applied behavior analysis (ABA) can unlock further learning opportunities, including workshops, conferences, and peer-to-peer networking. Remember, investing in legitimate training ensures ethical and effective assessment practices, far outweighing the risks associated with unauthorized resources.

a man called ove pdf

Discover the heartwarming story of A Man Called Ove by Fredrik Backman. This uplifting tale of friendship and community is available as a free PDF.

1.1 Overview of the Book

A Man Called Ove by Fredrik Backman is a heartwarming novel that tells the story of a grumpy old man named Ove, who appears to be surrounded by idiots in his daily life. Despite his rough exterior, Ove has a deep sense of loyalty and love, which is revealed through his interactions with his neighbors and his past. The book explores themes of grief, friendship, and community, offering a touching and humorous portrayal of life’s challenges. Available as a free PDF, this uplifting tale has captured the hearts of readers worldwide, making it a must-read for anyone seeking a story about human connection and resilience.

1.2 Author Background: Fredrik Backman

Fredrik Backman, a Swedish columnist, blogger, and author, was born in 1981 in Stockholm, Sweden. Known for his heartfelt and thought-provoking novels, Backman gained international acclaim with A Man Called Ove.

His writing often explores themes of human relationships, community, and emotional depth. Backman’s unique storytelling style blends humor with poignant reflections on life’s challenges. His other popular works include The Girl in the Spider’s Web and Beartown.

Backman’s ability to craft relatable characters and evoke strong emotions has made him a beloved author worldwide. His books, including A Man Called Ove, are celebrated for their universal appeal and heartfelt messages.

1.3 The Title: Who is Ove?

Ove is a man often perceived as grumpy and irritable, yet his story reveals a deep sense of loyalty and love. His gruff exterior hides a complex past marked by loss and resilience. Ove’s life is shaped by his late wife, Sonja, and his struggles with a world that seems to move too fast for him. His grumpiness stems from feeling misunderstood and surrounded by what he sees as incompetence. Despite this, Ove’s heartwarming journey shows how friendship and community can transform even the most stubborn of souls. The title reflects his multifaceted personality, inviting readers to look beyond his rough exterior and discover the man within.

Plot Summary of “A Man Called Ove”

Meet Ove, a grumpy old man with a heart of gold. His life is transformed when new neighbors arrive, uncovering his past and revealing the power of friendship.

2.1 The Main Storyline

Ove, a grumpy yet lovable man, feels surrounded by idiots, from neighbors who can’t reverse trailers to joggers and shop assistants. His life takes a turn when he’s ousted as Chairman of the Residents Association, a position he cherished. The story unfolds through his daily routines and interactions, revealing a man struggling with grief and social changes. Despite his rough exterior, Ove’s past and present slowly uncover a heartwarming tale of friendship and community. The PDF version captures his journey, highlighting his transformation from isolation to connection, making it a compelling read for those who enjoy stories of personal growth and the power of human relationships.

2.2 Key Characters in the Novel

Ove, the protagonist, is a grumpy yet lovable man who feels surrounded by incompetence. His late wife, Sonja, plays a crucial role in his backstory, shaping his personality and motivations. The neighbors, though often a source of frustration for Ove, gradually become integral to his life, offering unexpected support and friendship. Other characters, like the joggers and shop assistants, add depth to the narrative, highlighting Ove’s struggles with social changes. Together, these characters create a rich tapestry that explores themes of community and personal growth.

2.3 The Structure of the Narrative

The narrative of A Man Called Ove is skillfully structured, blending past and present to reveal Ove’s life story. Through flashbacks, the novel uncovers his childhood, marriage, and losses, while the present-day storyline introduces his grumpy yet endearing interactions with neighbors. The PDF version of the book maintains this structure, allowing readers to follow Ove’s emotional journey seamlessly. The alternating timelines create suspense and depth, making the story engaging. The author’s use of short, impactful chapters in the PDF format enhances readability, ensuring the narrative’s emotional weight is preserved. This structure highlights Ove’s transformation from isolation to connection, emphasizing themes of friendship and community.

Themes and Messages in the Book

3.1 The Theme of Grief and Loss

Ove’s journey explores profound grief and loss, revealing how these emotions shape his interactions and worldview, while highlighting resilience and the power of human connection.

Ove’s grumpiness hides profound grief and loss, stemming from his wife Sonja’s passing and his ousting as Residents Association Chairman. His rigid routines and anger mask deep emotional pain, reflecting his struggle to cope with life’s injustices. The novel poignantly explores how loss shapes identity, isolating individuals like Ove. Yet, through his neighbors’ persistence, Ove gradually confronts his sorrow, revealing a man deeply hurt but still capable of love and connection. This theme underscores the human capacity to heal and find meaning even in darkness, making Ove’s journey universally relatable and deeply moving.

3.2 The Power of Friendship and Community

The novel beautifully portrays how friendship and community transform Ove’s life. Despite his gruff exterior, Ove is surrounded by neighbors who gradually break down his defenses. Their persistent kindness and support highlight the profound impact of human connection. The story emphasizes that even small acts of friendship can lead to significant changes. The community’s role in Ove’s journey underscores the importance of belonging and mutual support. The PDF version of the book allows readers to explore these themes in depth, showcasing how relationships can heal emotional wounds and bring joy to a life marked by loneliness. Ove’s story is a heartwarming reminder of the power of community and friendship.

3.3 The Struggle with Social Changes

Ove’s struggle with social changes is a central theme in the book. His grumpy demeanor stems from his resistance to modernization and the evolving world around him. Simple tasks, like interacting with shop assistants who use unfamiliar technology, become sources of frustration. Ove’s ousting as Chairman of the Residents Association symbolizes his inability to adapt to new community dynamics. His rigid adherence to traditional ways clashes with the progressive changes in his neighborhood, leading to feelings of alienation and isolation. The book portrays Ove’s struggles with humor and empathy, highlighting the challenges of adapting to a rapidly changing society. Through Ove’s journey, Backman illustrates the universal struggle of accepting change and finding one’s place in a modern world.

Character Analysis

Ove, the grumpy but lovable protagonist, struggles with grief and social changes. His gruff exterior hides a heart of gold, revealed through his interactions with neighbors and community.

4.1 Ove: The Grumpy but Lovable Protagonist

Ove is a man of strong opinions and little patience for the world around him. He sees himself surrounded by incompetence, from neighbors who can’t reverse a trailer properly to joggers who disrupt his peaceful mornings. His gruff exterior hides a deep well of grief and loss, shaped by a life of personal struggles and unmet expectations. Despite his cantankerous nature, Ove’s story reveals a complex, deeply human character whose rough edges are softened by moments of quiet kindness and loyalty. His journey from isolation to connection highlights the transformative power of community and friendship, making him one of literature’s most memorable and endearing protagonists.

4.2 The Neighbors: Their Role in Ove’s Life

Ove’s neighbors play a pivotal role in his life, transforming his isolated existence. Initially perceived as nuisances, they gradually break down his gruff exterior; Their persistent kindness and genuine concern offer Ove unexpected support during difficult times, illustrating the profound impact of human connection. The neighbors, with their diverse personalities, bring joy and purpose into Ove’s world, challenging his cynical outlook. Through their interactions, Ove learns to embrace community and friendship, highlighting the transformative power of relationships in overcoming loneliness and grief. Their presence becomes a cornerstone in his life, fostering personal growth and a renewed sense of belonging.

4.3 Other Key Characters and Their Significance

Beyond Ove and his neighbors, several other characters play pivotal roles in shaping the narrative. Sonja, Ove’s late wife, is a central figure whose memory profoundly influences his actions and emotions. Her presence is felt throughout the story, highlighting her enduring impact on Ove’s life. The cat, a stray that adopts Ove, serves as a symbol of unexpected companionship and comfort. Additionally, Ove’s father and his complex relationship with his son are revealed through flashbacks, providing depth to Ove’s character. These characters, along with others like the young couple who move next door, contribute to the rich tapestry of the story, emphasizing themes of love, loss, and human connection.

Reception and Impact of the Book

The book’s PDF version has significantly boosted its popularity, making it accessible to a broader audience and enhancing its emotional impact globally.

5.1 Critical Acclaim and Reviews

A Man Called Ove has received widespread critical acclaim for its emotional depth and heartfelt storytelling. Reviewers praise Fredrik Backman’s ability to balance humor with poignant themes, creating a relatable and endearing protagonist in Ove; The novel has been celebrated for its exploration of grief, friendship, and community, resonating deeply with readers worldwide. Many critics highlight the book’s universal appeal, noting its ability to evoke both laughter and tears. The PDF version of the novel has further expanded its reach, making it accessible to a broader audience, including those with print disabilities. This accessibility has contributed to its enduring popularity and positive reception.

5.2 Commercial Success and Sales

A Man Called Ove has achieved remarkable commercial success, becoming a bestseller worldwide. Its popularity led to millions of copies sold globally, with the PDF version further boosting its reach. The book’s relatable themes and emotional depth resonated with readers, making it a favorite in many countries. Its success has been sustained by positive word-of-mouth and its availability in various formats, including the convenient PDF download. This accessibility has introduced the story to a broader audience, ensuring its enduring popularity in the literary market.

5.3 Cultural Impact and Reader Responses

The PDF version of A Man Called Ove has significantly contributed to its cultural impact, making the story accessible to a broader audience. Readers worldwide have embraced the heartwarming tale, resonating with its themes of friendship and community. The availability of the book in digital format has sparked countless discussions, fostering a sense of connection among readers. Many have shared their emotional journeys with Ove, highlighting how the story transcends generations. The PDF’s convenience has also made it a favorite in book clubs, further amplifying its reach. This accessibility has cemented the novel’s status as a modern classic, leaving a lasting impression on readers globally.

The PDF Version of “A Man Called Ove”

6.1 Availability of the PDF Online

The PDF of A Man Called Ove is widely available online, offered for free on platforms like Z-Library, making it accessible to readers worldwide instantly.

The PDF version of A Man Called Ove is widely available online. Platforms like Z-Library offer free downloads, making it accessible to readers globally. Published by Simon and Schuster in 2014, the book is easily searchable with its ISBN: 9781476738031. The PDF format allows readers to enjoy the story on various devices, ensuring convenience and portability. Additionally, the PDF is available to patrons with print disabilities, promoting inclusivity. With a filesize of 1.79 MB, it is lightweight and quick to download. This accessibility has contributed to the book’s popularity, enabling millions to experience Ove’s heartwarming journey. The PDF version remains a preferred choice for many due to its ease of use and universal compatibility.

6.2 How to Download the PDF Legally

To obtain a legal copy of A Man Called Ove in PDF format, visit authorized platforms like Z-Library or purchase it from Simon and Schuster’s official website. Ensure you respect copyright laws by avoiding unauthorized downloads, which are illegal and unethical; Supporting the author and publisher through legitimate channels is crucial. Additionally, libraries may offer e-book lending services, providing free access to the PDF for a limited period. Always verify the source’s legitimacy to protect your device from potential risks associated with illegal downloads. By choosing legal options, you contribute to the sustainability of literary works and honor the efforts of creators.

6.3 Benefits of Reading the PDF Format

Reading A Man Called Ove in PDF format offers numerous advantages. The digital version provides easy access, allowing readers to enjoy the book on various devices. Its compact file size ensures quick downloads, making it convenient for those with limited storage. The PDF format preserves the book’s layout, maintaining readability and visual appeal. Additionally, it enables features like text search and zoom, enhancing the reading experience. For patrons with print disabilities, the PDF is often accessible with screen readers. This format also reduces the need for physical storage, making it environmentally friendly. Overall, the PDF version of A Man Called Ove combines convenience, accessibility, and quality, ensuring readers can fully immerse themselves in Ove’s heartwarming story.

Adaptations and Related Media

7.1 The Movie Adaptation: “A Man Called Ove”

The book was adapted into a Swedish film, bringing Ove’s story to life on screen, capturing his journey of friendship and redemption.

The movie adaptation of A Man Called Ove brings the beloved novel to life, capturing the essence of Ove’s journey. Directed by Hannes Holm and starring Rolf Lassgård as Ove, the film beautifully portrays the transformation of a grumpy old man into a symbol of community and friendship. The movie stays true to the book’s themes of grief, loss, and the power of human connections. It received positive reviews for its heartfelt storytelling and strong performances. Fans of the book will appreciate how the film maintains the emotional depth and humor of the original story. The adaptation is a testament to the enduring appeal of Ove’s story, making it a must-watch for both readers and new audiences alike.

7.2 Other Adaptations and Interpretations

The PDF version of A Man Called Ove has become a popular way for readers to access the story, allowing for a deeper exploration of its themes. This format has made the book more accessible, especially to those with print disabilities, ensuring that Ove’s story reaches a broader audience. The digital version has also facilitated discussions and interpretations among readers, highlighting the universal appeal of Ove’s journey. By offering the book in PDF, readers can engage with the narrative in a convenient and flexible manner, further enhancing the story’s impact and resonance. The PDF’s availability has also spurred online book clubs and community discussions, enriching the reading experience and fostering a sense of connection among readers worldwide.

Discussion Topics and Book Clubs

8.1 Questions for Book Club Discussions

Explore Ove’s journey from loneliness to connection. Discuss how community transforms him and the lessons learned from his story of friendship and resilience.

Engage your book club with thought-provoking questions about A Man Called Ove. Discuss Ove’s transformation from a grumpy loner to a beloved neighbor. Explore how grief shaped his life and relationships. Analyze the role of friendship in breaking down his emotional walls. Reflect on the community’s impact on Ove’s journey. Consider the significance of Ove’s past and how it influences his present. Debate the theme of social changes and Ove’s resistance to them. Share thoughts on the novel’s message about the power of human connection. How does Ove’s story inspire personal growth and empathy? These questions will deepen your understanding of the book and spark meaningful conversations.

8.2 Themes for Reflective Essays

The novel A Man Called Ove offers rich themes for reflective essays, inviting readers to explore its deeper meanings. One prominent theme is the transformative power of friendship and community, as Ove’s gruff exterior softens through his neighbors’ persistence. Another is the struggle with grief and loss, highlighting how unresolved pain shapes behavior. The book also delves into the tension between tradition and modernity, as Ove resists societal changes. Additionally, it examines the importance of human connection in overcoming loneliness and finding purpose. These themes provide ample material for essays on personal growth, the impact of relationships, and the resilience of the human spirit. Reflective essays could also explore how Ove’s story challenges stereotypes about grumpy individuals, revealing their hidden depths.

The Author’s Other Works

Fredrik Backman’s other works include The Girl in the Spider’s Web and Anxious People, showcasing his mastery of character-driven stories with emotional depth and humor.

9.1 Fredrik Backman’s Writing Style

Fredrik Backman’s writing style in A Man Called Ove is a masterful blend of emotional depth, humor, and relatability. His prose is simple yet profound, capturing the complexities of human relationships and the quiet struggles of everyday life. Backman’s ability to weave poignant moments with light-hearted humor creates a narrative that resonates deeply with readers. His characters are flawed yet endearing, making it easy for audiences to connect with them. The PDF version of the book retains the essence of his storytelling, offering a seamless reading experience that highlights his unique voice and sensitivity to human emotions.

9.2 Popular Books by the Author

Fredrik Backman, the renowned author of A Man Called Ove, has captivated readers with his thought-provoking and emotionally resonant novels. Among his popular works are The Deal, a gripping story of loyalty and ambition, and Anxious People, a humorous yet profound exploration of human connections during a failed bank robbery. Another standout is Beartown, a poignant tale of hockey, community, and secrets in a small town. Backman’s ability to weave complex characters and relatable themes has made his books beloved worldwide, further solidifying his reputation as a masterful storyteller.

The PDF version of A Man Called Ove offers a convenient way to experience this heartwarming tale of friendship and community, available for free download.

10.1 Final Thoughts on the Book

A Man Called Ove is a heartwarming and thought-provoking novel that explores themes of grief, friendship, and community. Ove, the grumpy protagonist, captures readers’ hearts with his complex personality and hidden depths. The story, available as a free PDF, offers a poignant reminder of the power of human connection. Backman’s writing masterfully balances humor and sadness, creating a relatable and uplifting tale. The book’s universal themes resonate with readers worldwide, making it a must-read. Its availability in digital formats ensures accessibility for a broader audience. This touching story lingers long after the final page, leaving a lasting impression on the importance of kindness and understanding.

10.2 Encouragement to Read “A Man Called Ove”

Reading A Man Called Ove is a life-enriching experience that will leave you reflecting on friendship, community, and the power of human connection. Ove, a grumpy yet endearing protagonist, will capture your heart with his story of love, loss, and resilience. The novel’s uplifting message and relatable characters make it a must-read for anyone seeking a story that balances humor with profound emotional depth. With the convenience of a free PDF version available, there’s never been a better time to dive into this heartwarming tale. Let Ove’s journey inspire you to cherish the beauty of everyday relationships and the transformative power of kindness.