
Ridgid Shop Vac Instruction Manual: A Comprehensive Guide

Welcome! This manual provides essential guidance for various Ridgid wet/dry vac models, including WD06700, WD16650, and SP7051.
It details assembly, operation, maintenance, and troubleshooting, ensuring optimal performance and longevity of your RIDGID product.
Important Note: Always retain this manual for future reference, especially when ordering replacement parts or seeking warranty service.
Ridgid shop vacuums are renowned for their robust construction and versatile performance, catering to both wet and dry cleanup needs. These vacuums are designed for a wide range of applications, from home workshops and garages to construction sites and automotive detailing.
This manual serves as a comprehensive guide to understanding and utilizing your Ridgid shop vac effectively. It covers essential aspects, including safety precautions, assembly procedures, operational instructions, and maintenance guidelines.
Whether you own a 12-gallon, 14-gallon, 16-gallon, or larger capacity model (like WD06700, WD16650, or SP7051), this resource will help you maximize its capabilities. Remember to always refer to the specific instructions for your model, as detailed within this document, to ensure safe and efficient operation. Thank you for choosing RIDGID!
Understanding Your Model Number
Your Ridgid shop vac’s model number is crucial for identifying specific features, replacement parts, and warranty information. Common models include WD06700, WD0671EX0, WD09700, WD12800, WD16650, and SP7051. This number, typically found on the vacuum’s housing, is essential when contacting customer support or ordering accessories.
The model number dictates the vacuum’s capacity (e.g., 12-gallon, 16-gallon), motor horsepower, and included features. Referencing your model number ensures you receive the correct parts, such as filters or hoses, for optimal performance.
Locate the label – it’s usually near the power cord or on the back of the unit. Keep this number handy, along with the part number (like SP6737 or SP7051) when seeking assistance or replacement components. Accurate identification streamlines the process and guarantees compatibility.
Safety First: Important Safety Instructions
Prioritize safety when operating your Ridgid shop vac. Always disconnect the power cord before performing any maintenance, including filter changes or emptying the tank. Never use the vacuum to collect flammable liquids or combustible materials – this poses a serious fire hazard.
Avoid picking up toxic substances, as they can damage the motor and potentially release harmful fumes. Use only as described in this manual; improper use can lead to electric shock or injury. Inspect the power cord regularly for damage and replace it immediately if frayed or cracked.

Wear appropriate eye protection when cleaning to prevent debris from entering your eyes. Keep the vacuum away from children and ensure proper ventilation during operation. Never leave the vacuum unattended while plugged in.
Before You Begin: Carton Contents
Carefully unpack your new Ridgid shop vac and verify that all components are present. The carton should include the main vacuum body, a filter (typically a standard cartridge or pleated filter), a hose, a floor nozzle, and potentially various attachments depending on the model.
Check for caster and caster foot assemblies, as these may require separate installation. Confirm the presence of this instruction manual and any supplemental documentation regarding warranty information or accessory options. Inspect all parts for any shipping damage before proceeding with assembly.
If any parts are missing or damaged, do not attempt to operate the vacuum. Contact the retailer or Ridgid customer support immediately for assistance and replacement parts. Retain the original packaging for potential returns or warranty claims.
Assembling Your Ridgid Shop Vac
Begin assembly by ensuring the work area is clear and spacious. Refer to the diagrams within this manual for visual guidance. First, attach the casters and caster feet to the vacuum body, securing them firmly to ensure stability during operation. Next, locate the filter compartment and install the appropriate filter – typically a cartridge or pleated design – ensuring a proper seal to prevent dust and debris bypass.
For wet/dry functionality, confirm the filter is correctly positioned for the intended use. Then, connect the hose to the vacuum inlet, ensuring a secure connection. Finally, attach your desired nozzle or attachment to the hose end. Double-check all connections before powering on the unit.
Caster and Caster Foot Assembly
Begin by inverting the shop vac body to access the caster mounting points. Align each caster with its corresponding socket on the base. Firmly push each caster into place until it clicks or is securely seated. Next, attach the caster feet to the bottom of each caster. These feet provide added stability and protect flooring surfaces.
Ensure all casters rotate freely after installation. If a caster is stiff, gently manipulate it to loosen the movement. Properly installed casters are crucial for easy maneuverability during cleaning. Verify that all casters are securely attached before proceeding with further assembly. A loose caster can compromise the vacuum’s stability and potentially cause damage.
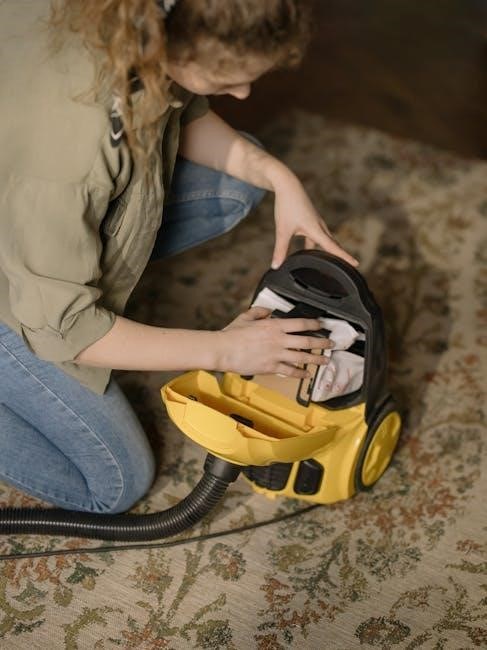
Filter Installation and Removal
To install the filter, locate the filter compartment, typically on the top or side of the shop vac. Carefully lift the lid or access panel to reveal the filter cavity. Align the filter with the designated slot and gently push it into place until it’s fully seated and secure. Ensure a tight seal to prevent dust and debris from bypassing the filter.
For removal, lift the filter compartment lid and grasp the filter. Pull the filter straight up and out of the cavity. Regularly inspect the filter for damage or excessive dirt buildup. Replace the filter immediately if you notice any tears or significant clogging. Using a damaged filter reduces suction and can harm the motor. Always use RIDGID replacement parts.
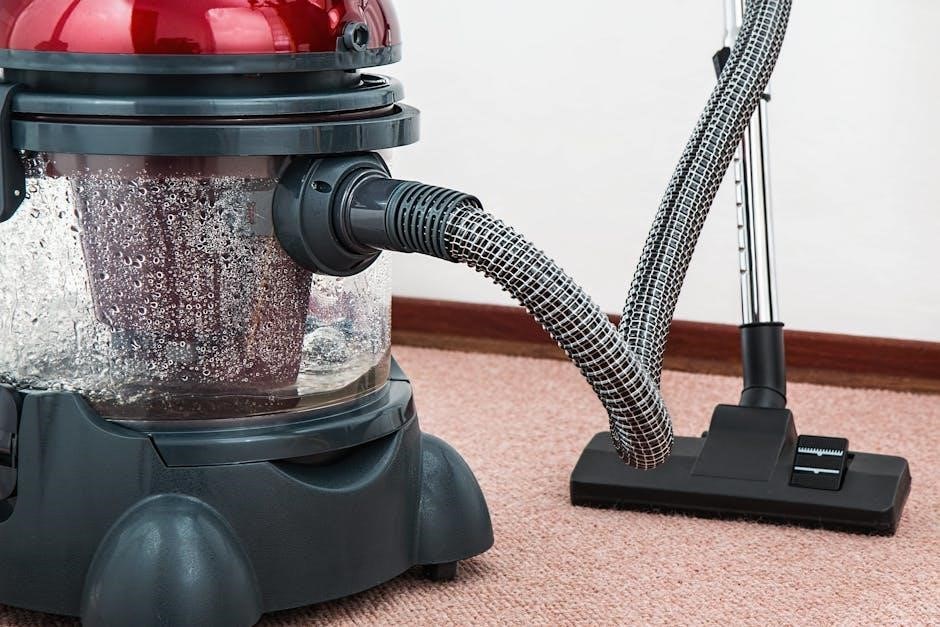
Understanding the Wet/Dry Functionality
Ridgid shop vacs are designed for both wet and dry pickup, offering versatile cleaning solutions. For dry pickup, use the standard filter to collect dust, dirt, and debris. Ensure the filter is properly installed to maintain suction and prevent dust from escaping. When switching to wet pickup, it’s crucial to remove the standard dry filter.
Wet pickup requires removing the dry filter to avoid damage and maintain airflow. Instead, use a wet pickup filter or operate the vac without a filter if appropriate for the task. Always empty the tank after wet pickup to prevent corrosion. Never pick up flammable liquids or explosive materials. Proper filter selection is key for safe and efficient operation.
Powering Up Your Shop Vac
Before connecting your Ridgid shop vac to a power source, ensure the switch is in the “Off” position. Inspect the power cord for any damage – do not use if frayed or damaged. Plug the vac into a grounded electrical outlet with the correct voltage. Avoid using extension cords if possible; if necessary, use a heavy-duty extension cord rated for the vac’s amperage.
The power cord is designed for indoor use. Do not expose it to water or harsh chemicals. If the cord becomes damaged, it must be replaced by a qualified technician. Always unplug the vac before performing any maintenance or changing accessories. Be mindful of the cord’s location to prevent tripping hazards.
Connecting to a Power Source
Prior to operation, verify the power switch is positioned to “Off” to prevent accidental starting. Locate a grounded electrical outlet that matches the voltage requirements of your Ridgid shop vac – typically 120V. Ensure the outlet is easily accessible and not obstructed. Insert the plug firmly into the outlet, avoiding loose connections.
Extension cords should be avoided whenever feasible. If an extension cord is necessary, utilize a heavy-duty cord with a sufficient gauge (wire thickness) to handle the vac’s amperage. Inspect the cord for damage before each use. Never use damaged cords. Always unplug the vac before disconnecting from the power source.
Understanding the Power Cord

Your Ridgid shop vac’s power cord is designed for safe and reliable operation, but requires careful handling. Inspect the cord regularly for cuts, abrasions, or any signs of damage. A damaged cord presents a significant electrical hazard and must be replaced immediately. Do not attempt to repair a damaged cord yourself; seek professional assistance.
Avoid running the cord over sharp edges, hot surfaces, or in areas where it could be stepped on or tripped over. When unplugging the vac, grasp the plug itself – never pull on the cord. Proper cord management extends the life of the cord and ensures safe operation. Keep the cord neatly coiled when not in use to prevent tangling and damage.
Using Your Ridgid Shop Vac: Basic Operation
To begin, ensure the filter is correctly installed and the tank is empty. Connect the desired hose and attachment to the vac’s inlet port. Power on the shop vac using the power switch, located on the unit. Direct the suction hose towards the debris you wish to collect, maintaining a steady and controlled movement.
For wet pickup, ensure the float valve is free to move. Avoid overfilling the tank, as this can damage the motor. Empty the tank when full, disconnecting the power cord before doing so. Always follow safety instructions regarding wet pickup to prevent electrical shock. Regularly check for clogs in the hose or inlet port for optimal suction.
Harnessing the Full Blowing Feature
Your Ridgid shop vac boasts a powerful blowing function, ideal for clearing sawdust, leaves, or debris from hard-to-reach areas. To activate, disconnect the hose from the vacuum port and reconnect it to the blower port, typically located on the exhaust side of the unit. Ensure the filter is securely in place during blowing operations.
Power on the vac; the airflow will now exit through the connected hose. Direct the airflow to the desired area, using the hose and attachments for focused blowing. Exercise caution when blowing loose materials, avoiding directing airflow towards people or sensitive equipment. Remember to turn off and unplug the vac before changing back to vacuum mode.
Filter Maintenance and Replacement
Maintaining your Ridgid shop vac’s filter is crucial for optimal performance and longevity. Regular cleaning prevents suction loss and ensures efficient operation; Inspect the filter frequently for damage or excessive debris. For dry pickup, tap the filter gently to dislodge dust; for wet pickup, allow the filter to dry completely before cleaning.
Ridgid offers various filter types, including standard, fine dust, and HEPA filters, suited for different applications. Replace the filter when it becomes damaged, clogged, or exhibits reduced airflow. Always use genuine Ridgid replacement parts to maintain warranty validity and ensure proper fit. Refer to your model’s documentation for specific filter type recommendations and replacement intervals.
Types of Ridgid Shop Vac Filters
Ridgid shop vacs accommodate diverse filtering needs with several filter options. Standard filters are ideal for general cleanup, handling both wet and dry debris effectively. Fine dust filters, possessing a tighter weave, excel at capturing microscopic particles like drywall dust, enhancing air quality. HEPA filters represent the highest level of filtration, removing 99.97% of particles 0.3 microns in size – perfect for allergy sufferers or asbestos abatement.
Foam sleeves often accompany dry filters, protecting them from larger debris and extending their lifespan. Cartridge filters offer increased surface area for prolonged use. Selecting the appropriate filter depends on the material being vacuumed; always consult your model’s manual for compatibility and recommended usage.
Cleaning and Replacing Filters
Regular filter maintenance is crucial for maintaining suction power and extending your Ridgid shop vac’s life. For dry filters, gently tap or brush off loose debris; avoid washing them, as this can damage the material. Wet filters require rinsing with clean water until visibly clear, then allowing them to dry completely before reuse. Inspect filters regularly for tears or damage – replace immediately if found.
Replacement frequency varies based on usage and debris type. A clogged filter significantly reduces performance. Always disconnect the power before filter access. Utilize genuine Ridgid replacement parts for optimal fit and filtration. Refer to your model’s manual for specific filter replacement instructions and form numbers.
Troubleshooting Common Issues

Experiencing problems with your Ridgid shop vac? Here are solutions to common issues. If the vac won’t turn on, first check the power cord connection and ensure the outlet is functioning. Verify the circuit breaker hasn’t tripped. Loss of suction often indicates a full dust collection bag or a clogged filter – empty or replace these components.
Inspect the hose for blockages and ensure a tight seal at all connections. If issues persist, examine the motor for unusual noises or overheating; Never attempt repairs beyond filter cleaning or replacement. Consult the manual or Ridgid customer support for further assistance. Remember safety first – always disconnect power before inspecting or troubleshooting.
Shop Vac Won’t Turn On
Is your Ridgid shop vac failing to power on? Begin with the simplest checks. First, verify the power cord is securely plugged into a working electrical outlet. Test the outlet with another device to confirm it’s receiving power. Next, inspect the circuit breaker or fuse box; a tripped breaker or blown fuse will prevent operation. Reset the breaker or replace the fuse if necessary.
Examine the power cord itself for any visible damage, such as cuts or fraying. If damage is present, do not use the vac and consult a qualified technician for repair. Ensure the on/off switch is fully engaged. If these steps don’t resolve the issue, further troubleshooting may be required, potentially indicating a motor problem.
Loss of Suction
Experiencing a noticeable decrease in suction power? The most common cause is a full collection tank – empty it immediately. Next, check the filter! A clogged or dirty filter significantly restricts airflow. Clean or replace the filter as needed, ensuring it’s properly installed. Inspect the hose for any blockages, kinks, or disconnections. Remove any obstructions you find.
Verify the hose connection to both the vac and the attachment is secure. Also, examine the intake opening for debris. A partial blockage here can severely limit suction. If suction remains weak after these checks, consider a leak in the hose or tank – inspect carefully for cracks or damage.

Maintenance and Care
Regular maintenance extends the life of your Ridgid shop vac. After each use, empty the collection tank and clean the filter – a dirty filter drastically reduces suction. Periodically inspect the hose for cracks, holes, or blockages, replacing it if damaged. Wipe down the exterior of the vac with a damp cloth to remove dust and debris.
Avoid using harsh chemicals or abrasive cleaners, as they can damage the plastic. Check the power cord regularly for any signs of wear or damage. Store the vac in a dry location to prevent corrosion. Utilize genuine Ridgid replacement parts for optimal performance and to maintain warranty validity.
Storage Guidelines
Proper storage safeguards your Ridgid shop vac’s performance and longevity. Always store the unit in a dry, well-ventilated area, protecting it from the elements and extreme temperatures. Before long-term storage, thoroughly empty and clean the tank, ensuring no debris remains to cause odors or blockages. Detach and store the hose and accessories separately to prevent damage or tangling.
Coil the power cord neatly and secure it to prevent tripping hazards. Avoid stacking heavy objects on top of the vac, as this could cause damage to the housing or components. Consider covering the vac with a dust sheet to protect it from accumulating dust during storage.
Ridgid Shop Vac Accessories
Enhance your Ridgid shop vac’s versatility with a range of available accessories. These tools expand its capabilities beyond basic cleanup, tackling specialized tasks efficiently. Choosing the right accessory depends on the application – consider crevice tools for tight spaces, floor nozzles for broad areas, and extension wands for reaching high or distant spots.
RIDGID offers various accessory kits, providing a convenient assortment of commonly used attachments. Always use genuine RIDGID replacement parts to ensure compatibility and maintain optimal performance. Properly attaching accessories is crucial; ensure a secure fit to prevent suction loss. Explore the full range of options to maximize your shop vac’s potential!
Choosing the Right Accessories
Selecting the appropriate Ridgid shop vac accessory significantly impacts cleaning effectiveness. For delicate surfaces, utilize a brush attachment to prevent scratching. Crevice tools excel in tight corners and along edges, while floor nozzles are ideal for large, open areas. Extension wands extend reach, simplifying overhead cleaning or accessing confined spaces.
Consider the material being collected. A specialized filter might be necessary for fine dust or liquids. Assess the task’s scale – larger jobs may benefit from wider nozzles or longer hoses. Genuine RIDGID accessories guarantee compatibility and optimal performance. Don’t hesitate to explore available kits offering a variety of solutions for diverse cleaning needs.
Using Different Attachments
Proper attachment use maximizes your Ridgid shop vac’s versatility. Securely connect attachments by firmly pushing them onto the hose end until they click into place. For crevice tools, maneuver the narrow nozzle into tight spaces, applying steady pressure for effective debris removal. Floor nozzles require sweeping motions across surfaces, overlapping each pass for thorough cleaning.
Brush attachments are best used with gentle scrubbing actions to avoid damage. Extension wands connect to attachments, extending reach; ensure a secure fit to prevent disconnection during operation. Always inspect attachments for damage before use, replacing worn or broken parts promptly. Utilizing the correct attachment for each task ensures optimal suction and cleaning results.

Warranty Information
RIDGID tools are proudly backed by a Lifetime Service Agreement. This agreement covers defects in workmanship and materials for the life of the tool, when used for its intended purpose. To qualify, simply register your new RIDGID shop vac within 30 days of purchase online or via mail-in registration.
The warranty does not cover parts damaged by misuse, abuse, or normal wear and tear. Alterations or repairs performed by unauthorized service centers will void the warranty. Proof of purchase is required for all warranty claims. Contact your local Home Depot or visit the RIDGID website for complete warranty details and claim procedures.
Finding Replacement Parts
Genuine RIDGID replacement parts are crucial for maintaining the performance and longevity of your shop vac. These parts are readily available at the store where you originally purchased your vacuum, typically Home Depot. Always insist on RIDGID parts to ensure compatibility and quality.
When ordering, having the correct Form Number is essential. This number, specific to each part, ensures you receive the correct component. You can find Form Numbers listed in the parts diagrams within this manual or on the RIDGID website. Online retailers also carry RIDGID parts, but verify authenticity before purchasing.
Where to Purchase Ridgid Parts
The primary source for genuine RIDGID shop vac replacement parts is the retailer where you initially purchased your vacuum cleaner. Most commonly, this will be a Home Depot store, offering a comprehensive selection of parts in-stock and available for immediate purchase. Their knowledgeable staff can also assist you in identifying the correct part for your specific model.
Alternatively, you can find RIDGID parts through authorized online retailers. However, it’s vital to verify the seller’s authenticity to ensure you’re receiving genuine RIDGID components. Always cross-reference the Form Number with the part description before completing your online order. Avoid purchasing from unverified sources to prevent receiving counterfeit or incompatible parts.
Using Form Numbers for Ordering
Accurate part identification is crucial when ordering replacements for your Ridgid shop vac. Utilizing the correct Form Number ensures you receive the precise component needed, avoiding compatibility issues and delays; These Form Numbers are unique identifiers assigned to each individual part by Ridgid.
Locate the Form Number in your shop vac’s parts list, typically found within this instruction manual or on the Ridgid website. When contacting a retailer or placing an online order, always provide the complete Form Number. This streamlines the process and minimizes the risk of errors. Form No. SP6728-1 is an example of a typical RIDGID form number.
Double-check the number before submitting your order to guarantee a successful purchase and keep your Ridgid shop vac operating efficiently.
Specific Model Information (WD06700, WD0671EX0, WD09700, WD0970M0, WD0970EX0)

This section details information pertinent to the WD06700, WD0671EX0, WD09700, WD0970M0, and WD0970EX0 Ridgid shop vac models. Refer to this manual for specific assembly instructions, including caster and caster foot assembly, and filter installation/removal procedures. These models share common features but may have slight variations in component placement.
Important Safety Instructions are applicable to all listed models; carefully review them before operation. Carton contents will vary slightly depending on the specific model purchased. Always ensure all listed components are present before beginning assembly. Replacement parts for these models are readily available where you originally purchased your vacuum.
Remember to save this manual for future reference regarding maintenance and warranty information.
Specific Model Information (WD12800, WD16650, WD1665EX0, WD16700, WD1670EX0)
This section provides specific guidance for Ridgid shop vac models WD12800, WD16650, WD1665EX0, WD16700, and WD1670EX0, encompassing 12 and 16-gallon capacities. Installation procedures are detailed within the main installation section of this manual, ensuring proper setup for optimal performance. These models are covered by the RIDGID warranty, guaranteeing freedom from defects in workmanship and materials.
Replacement parts are conveniently available at the retailer where your vacuum was purchased. Form Number SP6728-1 is useful when ordering specific components. Always prioritize using genuine RIDGID replacement parts to maintain the integrity and efficiency of your shop vac. Remember to retain this manual for future reference regarding maintenance and warranty claims.
Specific Model Information (SP7051 ⸺ 16 Gallon/60 Liter)
The SP7051 model, a 16-gallon/60-liter cart wet/dry vac, requires immediate filter replacement if damage is observed. Maintaining a clean filter is crucial for optimal suction and performance. Always utilize genuine RIDGID replacement parts, available at authorized service centers, to ensure compatibility and uphold the vacuum’s efficiency. Refer to the main filter maintenance section for detailed cleaning and replacement instructions.
This model’s robust construction is designed for demanding tasks, but proper care is essential. Regularly inspect the vacuum for any signs of wear or damage. Ensure all connections are secure before operation. Keep this manual accessible for future reference regarding maintenance schedules and troubleshooting guidance.
Specific Model Information (SP7033 ⎻ 12 Gallon/45 Liter)
The SP7033, a 12-gallon/45-liter wet/dry vac, demands strict adherence to the instructions outlined within this manual. Use the vacuum solely as described to prevent damage and ensure safe operation. Pay close attention to signs indicating potential issues, such as reduced suction or unusual noises, and address them promptly. Regular inspection of the unit is vital for maintaining peak performance.
This model is designed for versatility, but proper maintenance is key. Always disconnect the power source before performing any maintenance or filter changes. Utilize only genuine RIDGID replacement parts to guarantee compatibility and uphold the vacuum’s warranty. Refer to the troubleshooting section for solutions to common problems.
Specific Model Information (SP7050 ⸺ 14 Gallon/53 Liter)
The SP7050, a 14-gallon/53-liter wet/dry vac, requires careful operation as detailed in this manual. Strictly adhere to the provided guidelines for safe and effective use. Regularly inspect the vacuum for any signs of wear or damage, addressing issues immediately to maintain optimal performance. Proper maintenance is crucial for extending the lifespan of your RIDGID product.
Always disconnect the power supply before performing any maintenance procedures, including filter replacement. Utilize only genuine RIDGID replacement parts to ensure compatibility and avoid voiding the warranty. Pay attention to any unusual noises or loss of suction, as these may indicate a problem. Refer to the troubleshooting section for assistance.