
GE Self-Cleaning Oven Owners Manual: A Comprehensive Guide
Welcome! This manual provides essential guidance for operating and maintaining your GE self-cleaning oven, ensuring years of reliable performance and culinary success.

Congratulations on selecting a GE self-cleaning oven! This appliance is designed for effortless cooking and convenient maintenance. This manual is your comprehensive resource, offering detailed instructions on operation, safety, and care. You’ll discover how to maximize your oven’s features, from baking and broiling to utilizing the self-clean cycle.
GE values quality and customer satisfaction, reflected in this user-friendly guide and dedicated support team.
Safety Precautions & Important Warnings
Read carefully! Ensure proper installation and grounding by a qualified technician. Locate and mark the circuit breaker for easy access. Never use commercial oven cleaners – they can damage the self-clean function. If the self-clean cycle malfunctions, immediately disconnect power and contact a qualified technician for service.
Always use the appliance as described in this manual to prevent hazards.
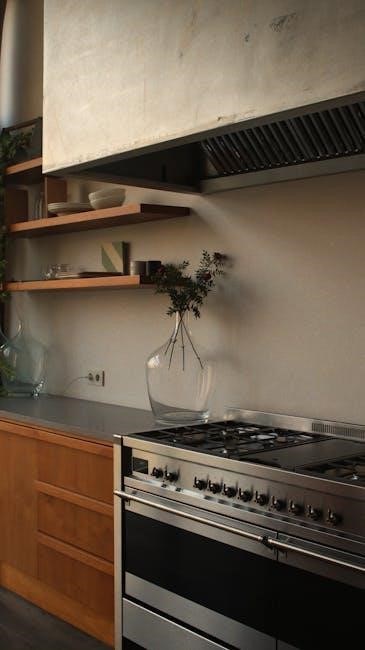
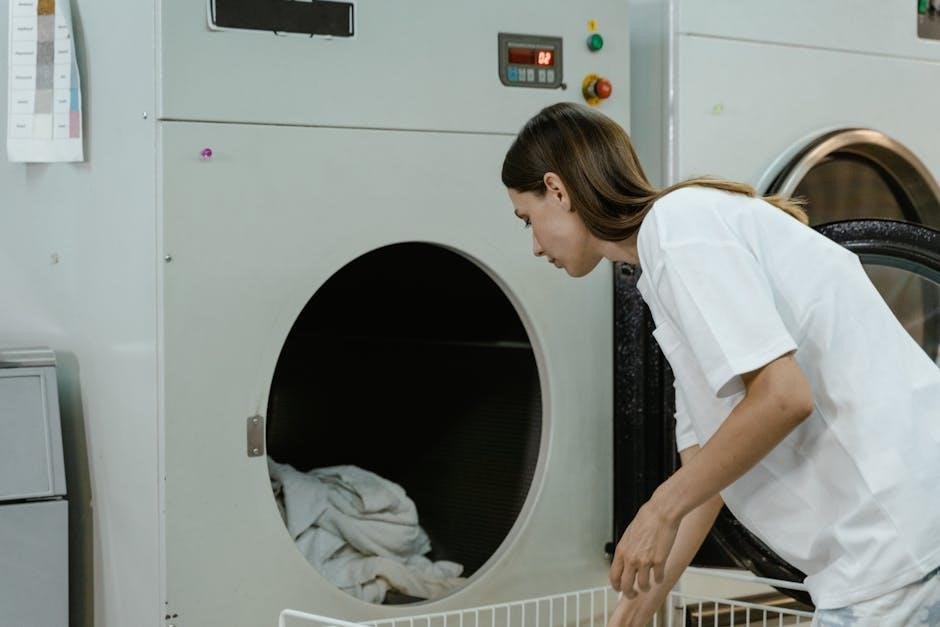
Understanding Oven Components
Your GE oven features a thoughtfully designed interior. Key components include the oven racks, adjustable for various cooking needs, and the self-cleaning baffle, crucial during the high-temperature cleaning cycle. The oven light illuminates the cavity for easy monitoring. Familiarizing yourself with these features will enhance your cooking experience.
Control Panel Overview
The control panel allows precise oven operation. It features intuitive controls for setting temperature and cooking time. Dedicated buttons initiate the self-clean cycle, while indicator lights display oven status. Explore the panel to understand functions like bake, broil, and temperature adjustments for optimal cooking results.
Oven Interior Features (Racks, Baffle, Light)
Your GE oven includes durable racks for versatile cooking placement. The self-cleaning baffle aids in efficient soil burning during the cycle. An interior oven light illuminates the cavity for easy monitoring of your dishes. Proper rack positioning and baffle maintenance contribute to optimal performance and cleaning effectiveness.
Initial Setup & Installation
Proper installation is crucial for safe and efficient operation. Ensure a qualified installer connects the oven with correct electrical grounding, referencing the provided instructions. Locate and mark the circuit breaker for easy access. Before first use, a burn-off cycle eliminates protective liners and odors, preparing your GE oven for optimal performance.
Ensuring Proper Electrical Connection & Grounding
A qualified installer must perform the electrical connection and grounding, adhering strictly to provided instructions. This safeguards against electrical shock and ensures correct oven function. Verify the voltage matches the oven’s requirements. Improper grounding can create a hazard; confirm a secure ground connection is established for long-term safety.
First-Time Use: Burning Off Protective Liners
Before initial use, run a burn-off cycle to eliminate protective liners applied during manufacturing. Set the oven to a high temperature (typically bake at 450°F) for at least one hour. This process may produce odors and some smoke – ensure adequate ventilation. This step prepares the oven for optimal cooking performance.
Operating Your Oven: Baking & Broiling
Your GE oven offers versatile baking and broiling options. To begin, set the desired temperature and cooking time using the control panel. Utilize the oven racks strategically for optimal results; adjust rack positions based on the recipe. Remember to preheat the oven for consistent baking. Broiling uses direct heat, so watch food carefully!
Setting Temperature & Cooking Time
Precisely setting temperature and time is crucial for successful cooking. Use the control panel to input your desired settings; the oven will maintain the selected temperature. For accurate results, consult your recipe. Remember that preheating ensures even cooking. Adjust cooking times as needed based on your observations.
Using Oven Racks for Optimal Results
Proper rack placement significantly impacts cooking performance. Generally, position racks in the center for consistent heat distribution. For broiling, use the top rack position. When baking multiple items, stagger racks to allow for even air circulation. Avoid overcrowding; leave space around dishes for optimal results and efficient heating.
The Self-Cleaning Cycle: A Step-by-Step Guide
The self-clean feature utilizes high temperatures to eliminate baked-on residue. First, remove all racks, cookware, and any loose debris. Ensure the oven door can fully lock. Initiate the cycle via the control panel, selecting the desired cleaning duration. Do not interrupt the process; allow complete cooling before wiping away ash.
Preparing the Oven for Self-Cleaning
Before initiating the self-clean cycle, meticulously remove all cookware, baking stones, and loose debris from the oven interior. Crucially, disassemble and remove the self-cleaning baffle and racks. Wipe up any large spills or excessive grease. Ensure the oven door seals properly for optimal performance and safety during the high-temperature process.
Initiating and Monitoring the Self-Clean Process
To begin, press the “Self-Clean” button and select the desired cycle duration – typically 2 to 4 hours. The oven door will automatically lock for safety. Avoid opening the door during operation! Monitor the process; a slight odor is normal. If a malfunction occurs, immediately turn off the oven and disconnect power.
Self-Clean Cycle Duration & Temperature
The self-clean cycle operates at extremely high temperatures, reaching approximately 900°F (482°C) to effectively burn away food residue. Cycle durations vary from 2 to 4 hours, depending on soil level. Longer cycles are for heavily soiled ovens. Ensure proper ventilation during operation due to potential odors.
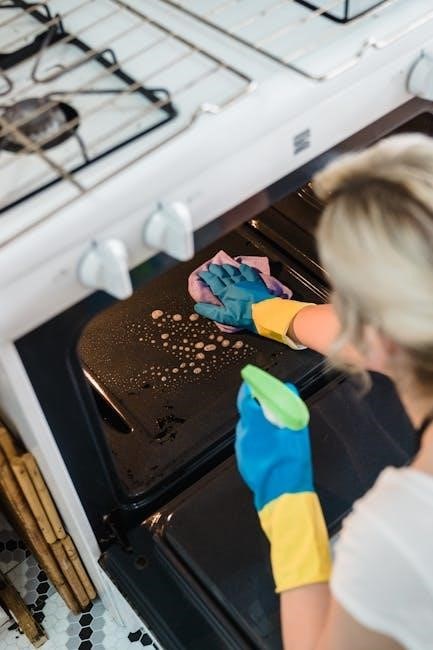
Post-Self-Clean Procedures
After the self-clean cycle completes, allow the oven to cool completely before opening the door. A fine ash residue will remain; once cool, simply wipe it away with a damp cloth. Avoid using abrasive cleaners. Ensure proper ventilation during cool-down, and inspect for any remaining debris.
Allowing the Oven to Cool Down
Crucially, do not open the oven door immediately after the self-clean cycle finishes. Allow ample time for complete cooling – this prevents burns and ensures safe ash removal. The door lock will release automatically when safe. Patience is key for a smooth post-clean experience.
Wiping Away Ash Residue
Once cooled, a fine ash residue will remain. Use a damp cloth to easily wipe away this residue from the oven’s interior surfaces, including the door and frame. Avoid abrasive cleaners, as they can damage the finish. This simple step completes the self-clean process effectively.

Cooktop Cleaning & Maintenance

Maintaining a clean cooktop is crucial for optimal performance. Utilize the CERAMA BRYTE Cleaning Pad specifically designed for ceramic glass surfaces. Always wait until the cooktop is completely cool before cleaning, and avoid abrasive materials that could cause scratches or damage the surface’s integrity.
Using CERAMA BRYTE Cleaning Pad
For effective cooktop cleaning, apply the CERAMA BRYTE Cleaning Pad with gentle pressure. Use a circular motion to remove spills and residue. Pair the pad with CERAMA BRYTE cleaner for optimal results, ensuring a streak-free shine. Avoid harsh scrubbing, which can damage the glass surface; a little patience yields the best outcome.
Avoiding Damage to the Cooktop Surface
Protect your cooktop! Avoid sliding cookware across the surface, as this can cause scratches. Do not use abrasive cleaners or scouring pads, which will dull the finish. Immediately clean sugary spills to prevent pitting. Always ensure the cooktop is cool before cleaning, preventing thermal shock and potential cracking.
Troubleshooting Common Issues
Facing problems? If your oven isn’t heating, check the power supply and ensure the controls are set correctly. For self-clean malfunctions, immediately turn off the oven and disconnect power. Contact a qualified technician for repairs; never attempt self-repair. Refer to this manual for detailed guidance.
Oven Not Heating Properly
Is your oven failing to heat? First, verify the power supply and circuit breaker. Ensure the controls are correctly set for your desired cooking mode and temperature. A faulty heating element could be the issue; professional diagnosis is recommended. Consult the full manual for detailed troubleshooting steps.
Self-Clean Cycle Malfunctions
If the self-clean cycle isn’t working, immediately turn off the oven and disconnect power. Do not attempt repairs yourself! A malfunctioning cycle indicates a potential safety hazard. Contact a qualified technician for inspection and repair. Refer to the manual’s safety section and warranty information for assistance.
Preventative Maintenance Tips
To maximize oven life, keep the vent unobstructed for proper airflow. Prevent grease buildup through regular wiping. Never line the oven bottom with aluminum foil – it can cause overheating and damage. Avoid commercial oven cleaners; they’re unnecessary and potentially harmful to the self-clean function.
Keeping the Oven Vent Unobstructed
Maintaining clear oven vents is crucial for efficient and safe operation. The vent, typically located at the back of the oven, allows for proper airflow during baking and especially during the self-clean cycle. Blockages can lead to overheating, reduced performance, and potential damage.
Avoiding Grease Buildup
Regular cleaning prevents grease accumulation within your GE oven, which can smoke during cooking and potentially ignite. Wipe up spills immediately and avoid letting food residue bake onto surfaces. The self-clean cycle assists, but frequent manual wiping, especially after roasting, minimizes stubborn buildup and maintains optimal oven performance.
Avoiding Aluminum Foil Lining
Do not line the oven bottom with aluminum foil. Foil can trap heat or reflect it, leading to potential oven damage or even a shock hazard. It also hinders efficient baking and can interfere with the self-clean cycle’s effectiveness. Protect the bottom only with manufacturer-approved oven liners if desired.

Never Using Commercial Oven Cleaners
Do not use commercial oven cleaners within your self-cleaning GE oven. The self-clean cycle utilizes extremely high temperatures to eliminate food soils, rendering additional cleaners unnecessary and potentially damaging. Using them can create harmful fumes and may void your oven’s warranty, so avoid their use entirely.
Understanding Your Oven’s Warranty
Your GE oven is covered by a limited warranty, protecting against manufacturing defects in materials and workmanship. The duration varies based on the specific model; consult your warranty documentation for details. Proper installation and adherence to the owner’s manual are crucial for maintaining warranty validity. Retain proof of purchase!
Contacting GE Customer Support
For assistance with your GE oven, reach out to GE’s dedicated customer support team. You can find contact information – including phone numbers and online chat options – on the GE Appliances website. They are equipped to address troubleshooting, warranty claims, and any operational questions you may encounter.
Downloading the Full Owners Manual Online
Access a complete digital version of your GE oven’s owners manual directly from the GE Appliances website; Easily downloadable as a PDF, this resource offers detailed instructions, diagrams, and troubleshooting guides. Locate specific information quickly using the search function within the manual for convenient access to needed support.
Accessing PDF Versions of the Manual
Download the comprehensive PDF manual for offline viewing and easy reference. This digital format preserves all original content, including detailed diagrams and troubleshooting steps. Accessing the PDF allows you to search for specific topics quickly and print sections for convenient use during oven operation or maintenance procedures.
Finding Specific Information Within the Manual
Utilize the manual’s table of contents and index to quickly locate information regarding self-cleaning cycles, cooktop care, or troubleshooting common issues. The PDF version enables keyword searches for pinpoint accuracy. This efficient navigation ensures you can readily access the guidance needed for optimal oven performance and safe operation.